
Whipped Feta Dip
This post may include affiliate links. Thank you for your support.
This whipped feta dip is creamy, rich, and the perfect balance of sweet and salty. It comes together in just 10 minutes with a handful of ingredients and makes an easy appetizer with pita or fresh veggies.

The first time I ever had whipped feta it was at the Butcher & Bee restaurant and I was hooked after one bite. It was soo good and I knew I wanted to recreate my own version at home with a healthier spin.
It turned out perfect and now I make it often for a game day snack or as an appetizer when we’re having dinner guests! I love serving it with warm pita bread, but it’s also delicious served alongside fresh vegetables and pita chips. And if you have leftovers, you can also use it as a spread on sandwiches and wraps.
Table of Contents
Why I Love This Whipped Feta Dip

- Sweet & Salty: The combo of salty feta and sweet honey = chef’s kiss!
- Quick & Easy: Super easy to whip up… all you need is 10 minutes and 4 main ingredients.
- Healthy: It’s made healthier with Greek yogurt instead of mayonnaise, sour cream and/or cream cheese.
- Crowd Pleaser: It’s the perfect appetizer to serve a crowd!
Whipped Feta Ingredients
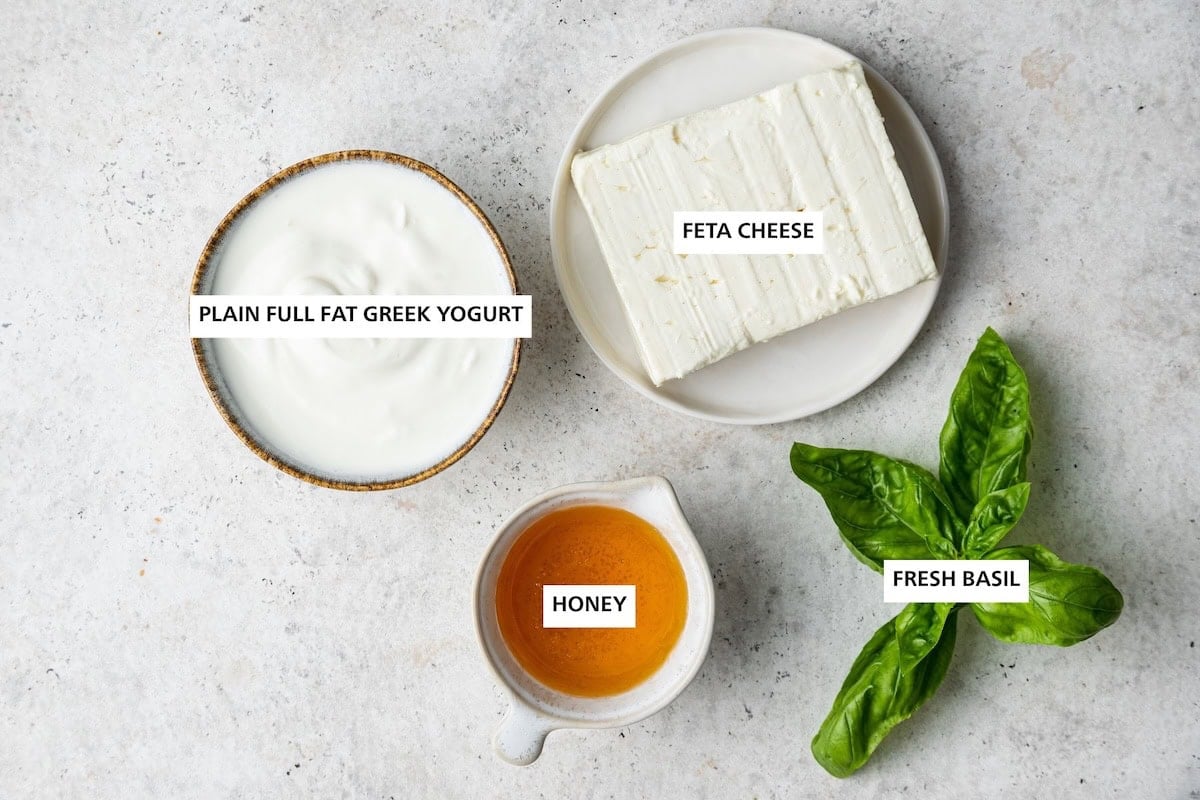
- feta cheese – the star of the show! The feta is what gives this dip its rich, salty flavor and creamy texture. For the best results, opt for a high-quality block of feta sold in a brine. Look for feta that is made in Greece and only contains sheep’s milk (and maybe some goat’s milk).
- greek yogurt – instead of mayo, cream cheese or sour cream as used in some other feta dips, we’re using Greek yogurt. When blended with the feta cheese, the Greek yogurt helps to make this dip more spreadable and it also adds a healthy dose of protein and calcium.
- honey – we’re adding a well of honey to the feta dip for serving, which adds a subtle sweetness, helping to balance out the salty flavors. It also adds a hint of floral flavor that pairs nicely with the tangy feta cheese.
- fresh basil – I love adding fresh herbs to my recipes whenever possible and I find that basil pairs perfectly with this feta dip. It also adds a pop of color for serving.
- black pepper – optional, but a crack of fresh black pepper adds depth and some spice to this dip!
- pita bread – feel free to serve this dip with whatever you please or use it as a spread, but I love serving this dip alongside warm pita bread.
Whipped Feta Variations
- Spicy: Add crushed red pepper flakes or a little diced jalapeño.
- Herby: Blend in fresh herbs like chives, dill, or parsley.
- Garlic: Add a clove of fresh or roasted garlic for extra depth.
- Lemon: A squeeze of lemon juice or zest brightens everything up.
- Toppings: Finish with olives, pistachios, pine nuts, or a drizzle of olive oil.
How to Make Whipped Feta
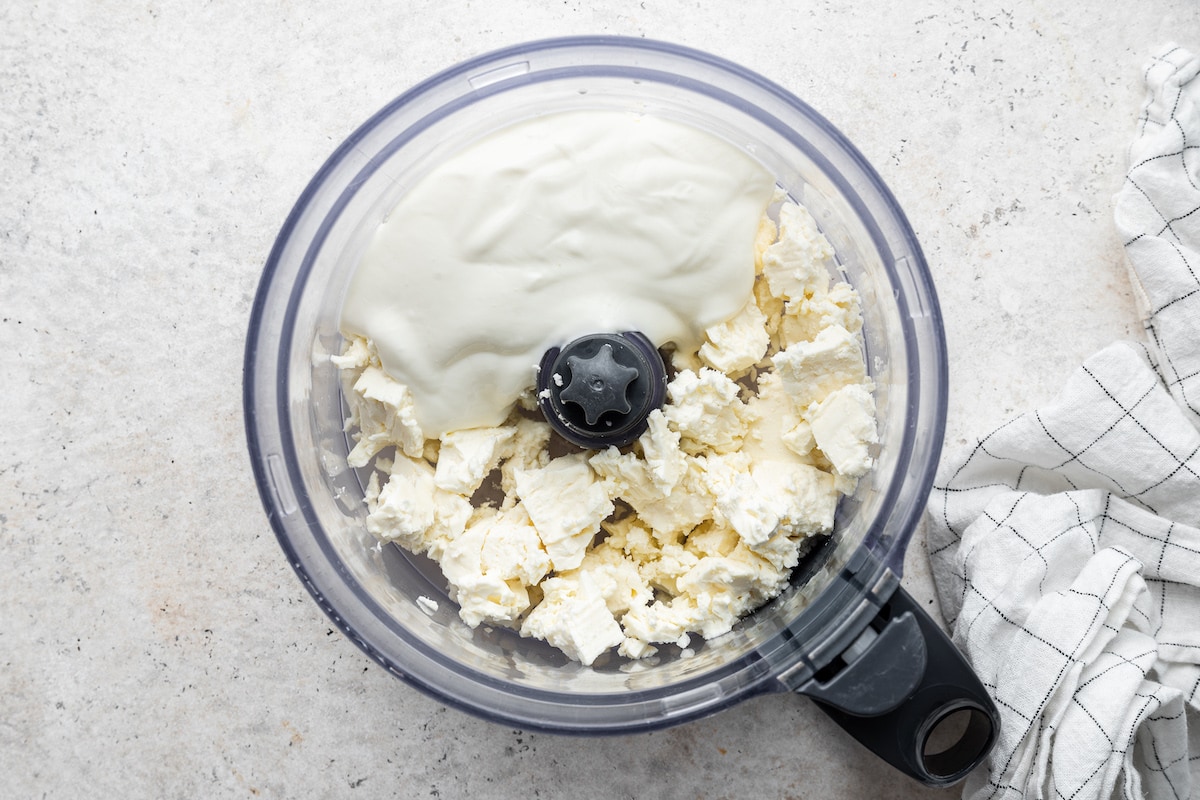
Step 1: Add the feta and yogurt to a food processor, or a high speed blender.
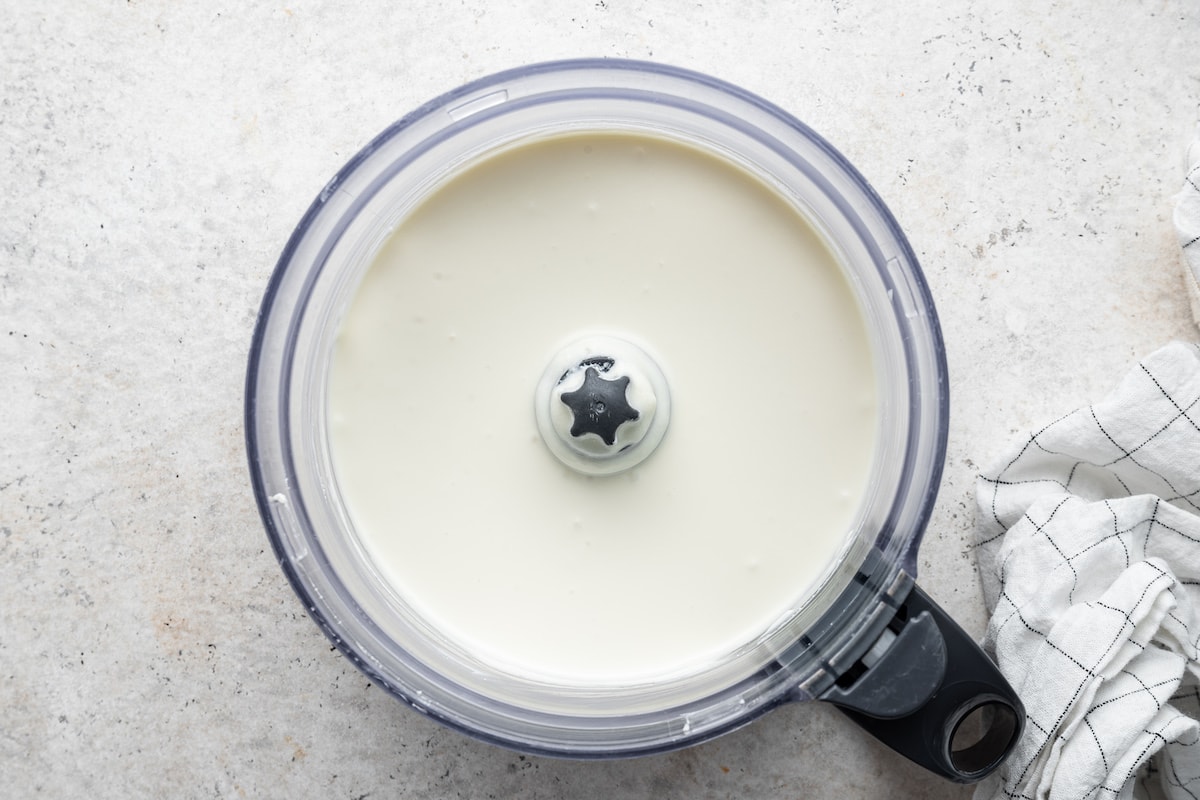
Step 2: Blend on high until smooth. Add to a bowl with honey and garnish with fresh basil.
Brittany’s Tip
- Let the feta come to room temperature before blending. This helps it break down more easily and results in a smoother, creamier whipped feta.

What to Serve With Whipped Feta
- Pita bread – A classic pairing with whipped feta dip! Homemade pita or store-bought, warmed pita are both great options. The pita bread helps to scoop up the dip, making it easier to enjoy.
- Pita chips – If you don’t have pita bread, pita chips are the next best option.
- Crackers – Try my almond flour crackers or use store-bought. I’ve seen pita chip crackers at Trader Joe’s that would be pefect.
- Falafel – The perfect dip for baked falafel!
- Fresh veggies – This dip is also delicious served with fresh veggies. My go-to choices would be carrots or cucumbers as they’ll be easier to dip. It’s also a great addition to any mezze platter.

How to Store
This whipped feta dip stores really well in the fridge. Store any leftover feta dip in an airtight container in the fridge for 3-4 days. Just note, that the honey will sink to the bottom as it sits, so you’ll want to give your dip a stir before serving again.
Frequently Asked Questions
Yes, you can switch up the yogurt, but I highly recommend sticking with plain, full-fat Greek yogurt. It gives the whipped feta that creamy, rich texture we’re going for. Plus, watch out for yogurts with added sugars—they can sneak in sweetness that might overpower the balance of flavors in this dip.
I haven’t tried making a vegan version myself, but I believe there are some cashew-based feta alternatives and dairy-free yogurts that could work. The flavor and texture will definitely be different—likely a bit more nutty and less tangy—but it could still be a tasty option. If you decide to try it out, I’d love to hear how it turns out, so please let me know in the comments!
If honey isn’t your thing, you can use maple syrup or agave nectar. Both add a lovely sweetness. Maple syrup adds a rich, warm note, while agave is more neutral.
More Dips and Spreads to Try


If you enjoyed this recipe, please consider leaving a ⭐ star rating and let me know how it went in the 📝 comments below.

Whipped Feta Dip
Ingredients
- 8 oz feta cheese block, broken into smaller chunks
- ¾ cup plain full fat Greek yogurt
- ¼ cup honey
- 1 Tablespoon fresh basil, for serving
- Crack of pepper, for serving
- Pita bread, for serving
Instructions
- Add feta chunks and Greek yogurt to your food processor.
- Blend on high until smooth and creamy (about 4-5 minutes). You might have to stop a few times throughout to scrape the sides down.
- Scoop whipped feta into a shallow bowl or on a small plate. Using a spoon, create a small well in the center of the cheese. Add honey to well and garnish with fresh basil and crack of pepper.
- Serve immediately with warm pita bread.
Notes
- Texture matters: For the smoothest whipped feta, make sure the feta is at room temperature before blending and scrape down the sides of the food processor as needed.
- Serving ideas: Serve with warm pita, pita chips, or fresh veggies, or use leftovers as a spread for sandwiches and wraps.
- Storage: Store leftover whipped feta in an airtight container in the fridge for up to 3-4 days. Give it a quick stir before serving.
Nutrition
Nutrition information is automatically calculated, so should only be used as an approximation.
Equipment
Like This Recipe? Rate & Comment Below!


Can’t wait to try this with our dinner guests! Any idea how far in advance I could make it?
You could make this a day or so in advance, but I would recommend remixing because the honey will sink to the bottom. The closer you can make it to the time of eating it the fresher it will be though. Hope you enjoy this recipe!