
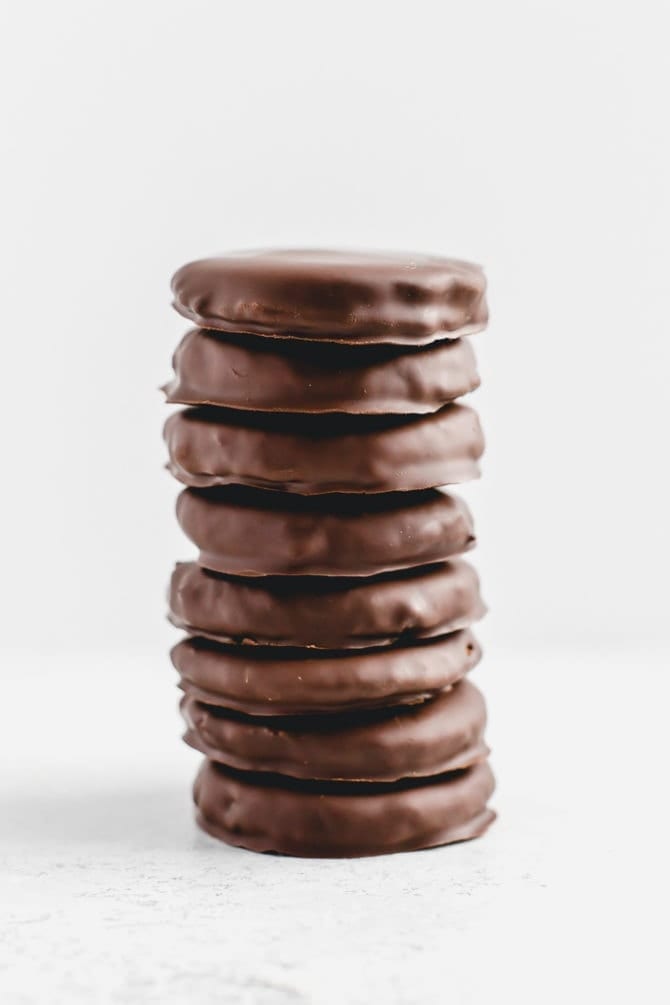
Homemade Thin Mints
This post may include affiliate links. Thank you for your support.
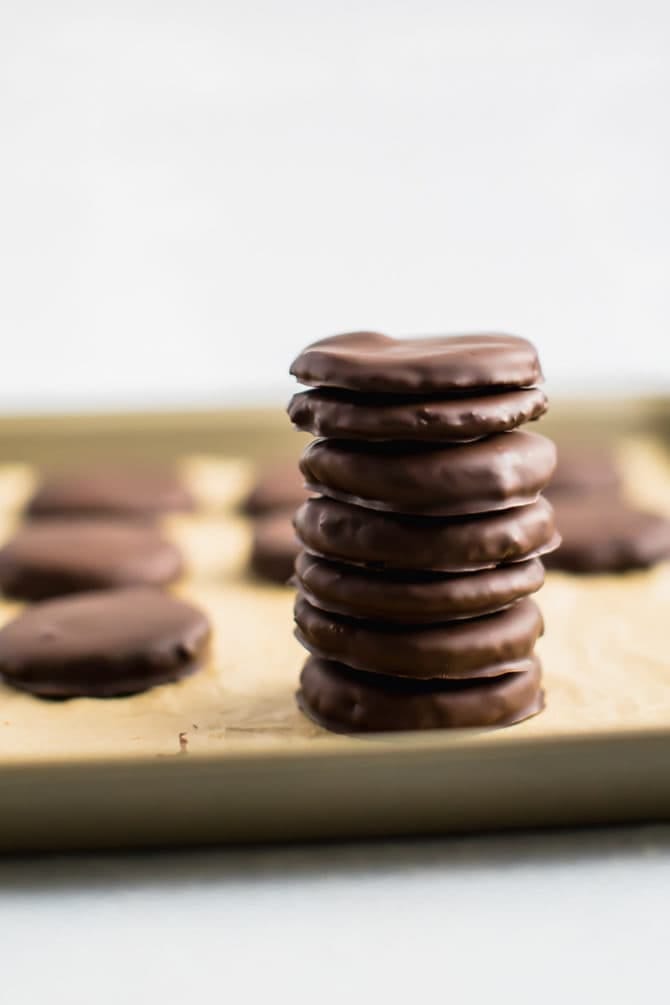
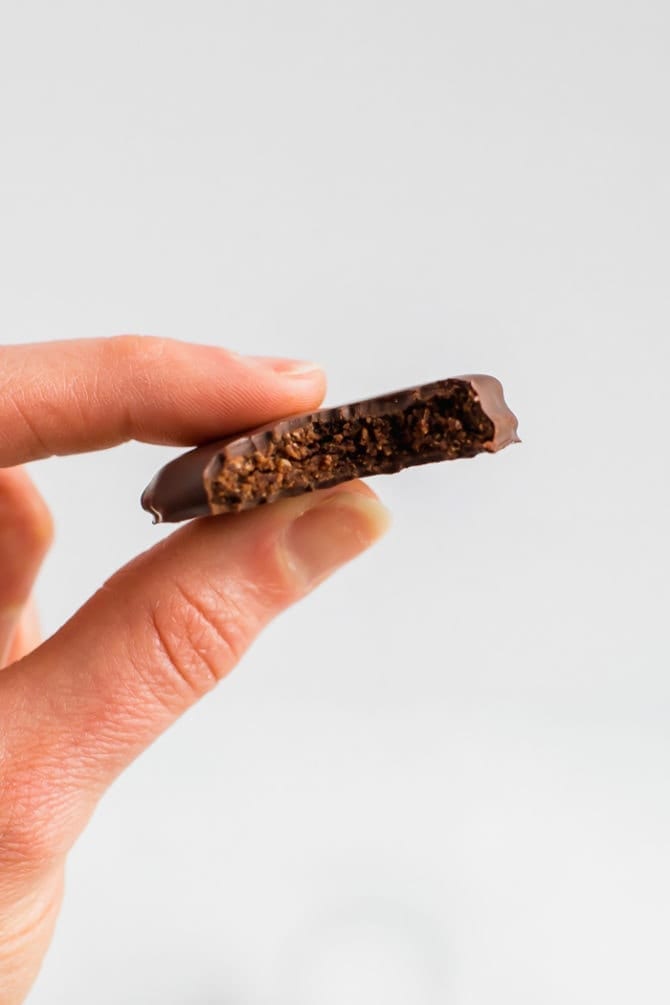
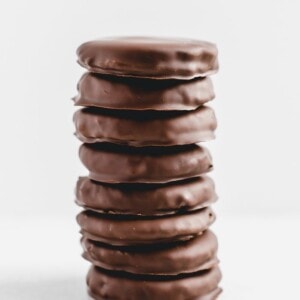
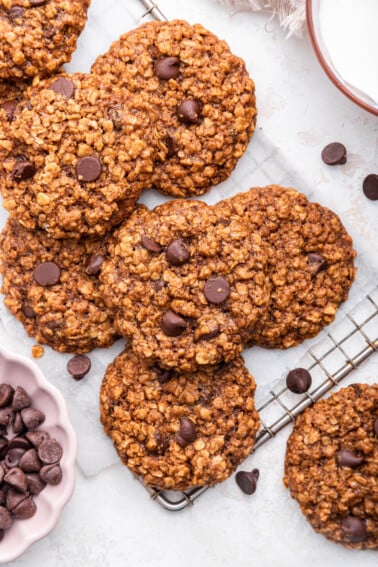
Homemade healthy Thin Mints made with almond flour, pure maple syrup and coated in dark chocolate. Vegan + gluten-free.
I’ve been on a roll with Girl Scout cookie recreations.
It all started with my homemade Samoas. People are shocked by how easy they are to make and LOVE that they actually taste like the real deal cookies (some people say they taste even better) and a few people have called them LIFE-CHANGING!
Given all the Samoas cookie love, I decided I needed to recreate my other favorites… Tagalongs, Do-Si-Dos and now Thin Mints!
Healthier Homemade Thin Mints
To be honest, traditional Thin Mints aren’t as unhealthy as most Girl Scout Cookies, but they still contain artificial and processed ingredients.
For this version, we’re skipping all of those extra ingredients like white sugar, palm oil and artificial flavoring and making them with just seven simple ingredients to create a vegan and gluten-free version of this Girl Scout classic!
These Thin Mints aren’t necessarily low calorie or low sugar, but they are made with natural ingredients including natural sugars from the pure maple syrup and without preservatives.
In terms of the chocolate chips, I recommend using Lily’s chocolate chips or Hu Kitchen gems for less sugar, but feel free to use what you have on hand.
Instead of using white flour we’re using almond flour for the cookie, which was actually inspired and adapted from my almond flour crackers!
WATCH HOW TO MAKE HEALTHY THIN MINTS:
Ingredients Needed
- almond flour – I love using almond flour for these cookies because it gives them a rich, nutty flavor that isn’t too overpowering. That said, I have tested these cookies with both all-purpose flour and oat flour and the cookies turned out well with both. Note: If you do use all-purpose flour, you’ll need to add a touch of liquid as the dough turns out quite dry. I added 1 Tablespoon of almond milk and it worked perfectly.
- cocoa powder or cacao powder
- pure maple syrup – maple syrup gives these cookies a nice subtle sweetness, but you can sub this for any liquid sweetener of your choice like honey, agave, monk fruit maple syrup, etc.
- coconut oil – this is used to help make the melted chocolate thinner, which makes it easier to dip the Thin Mints. You can skip it, but your melted chocolate will likely be pretty thick. And I recommend using refined coconut oil if you don’t want any coconut flavor!
- sea salt
- peppermint extract – you can use peppermint oil instead fine, but the oil is much more concentrated than extract, so you probably will only need a few drops.
- dark chocolate chips – I like to use Lily’s dark chocolate chips or Hu Kitchen gems to keep this recipe lower in sugar, vegan and dairy-free.
Steps for Making Healthy Thin Mints
Form dough: Combine almond flour, cocoa powder, maple syrup, coconut oil, sea salt and peppermint extract in a medium bowl until dough forms. The mixture might seem a little crumbly, but that’s okay. Place dough in the fridge for about 15 minutes.
Pre-heat oven + line baking sheet: While the dough is in the fridge, preheat your oven to 350°F and prep a baking sheet by lining it with parchment paper.
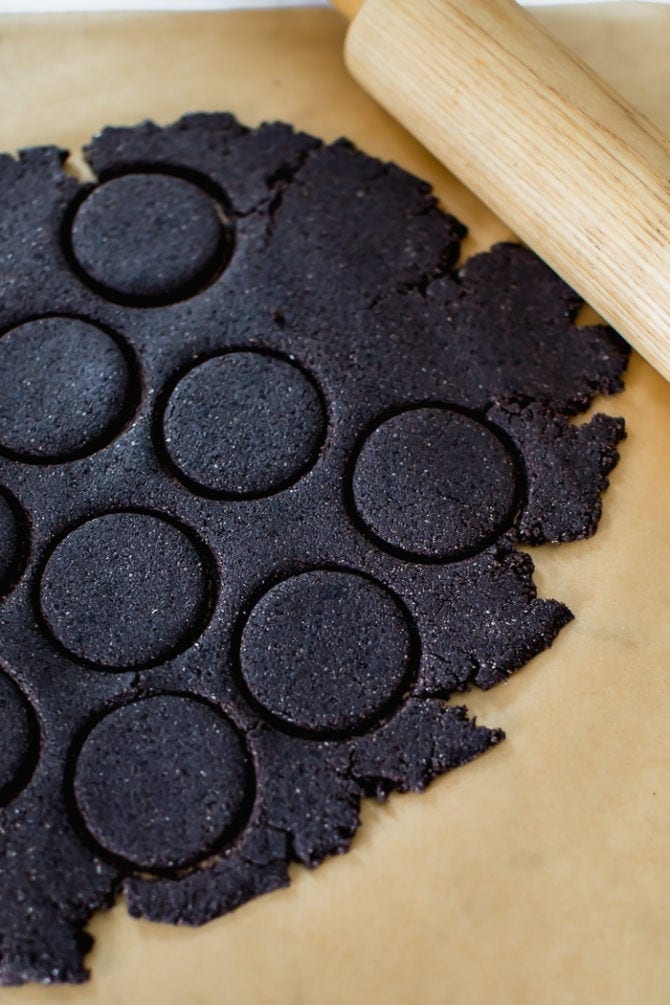
Cut cookies: Place the chilled dough on a piece of parchment paper. Cover it with a second piece of parchment. Pat it down with your hands and then use a rolling pin to roll out the dough.
You’ll want the dough semi-thin— about 1/4 of an inch thick. Use a small circular cookie cutter to cut out circular cookies and place each on your prepared baking sheet. I used a shot glass for this and it worked great.
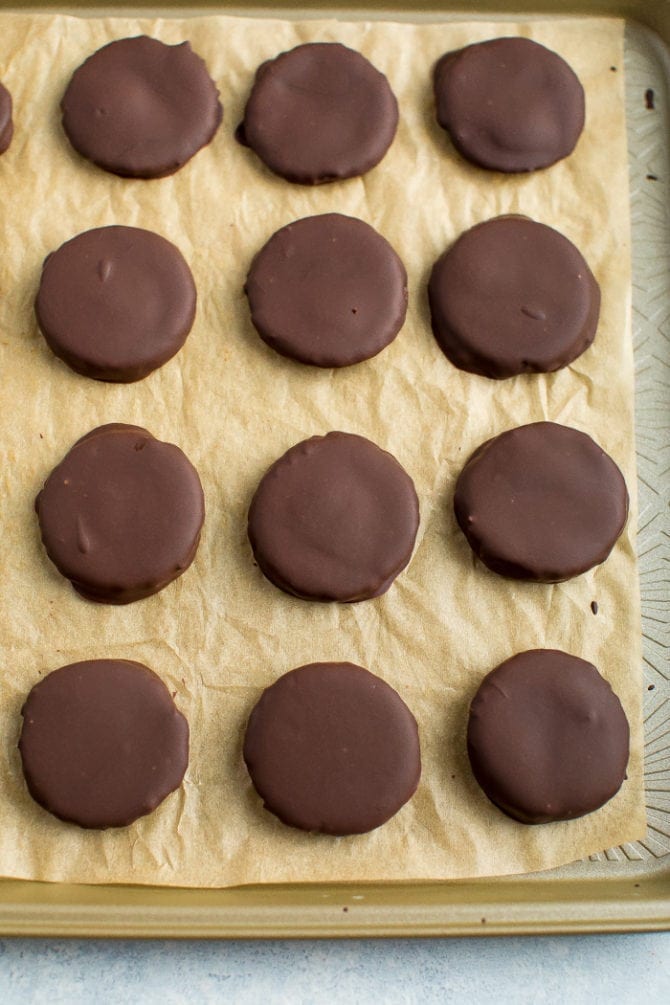
Bake: Place cookies in the pre-heated oven and bake for 13-15 minutes. Remove from the oven and let cool completely.
Melt chocolate: Melt chocolate by adding your chocolate chips and coconut oil into a small bowl. Melt in the microwave using 30-second increments or use a double boiler. Once chocolate is melted, stir in the peppermint extract.
Coat cookies: Using a fork, dip cookies into the melted chocolate. Let any excess chocolate drip off before placing the cookie back on the parchment lined baking sheet.
Set chocolate: Place cookies in the fridge or freezer for the chocolate to set, about 30 minutes. Once the chocolate has set, you’re ready to enjoy!
How to Store Homemade Thin Mints
If you’re not eating these cookies right away I recommend storing them in an airtight container in your fridge or freezer.
They’ll stay good for up to a week in the fridge.
That said, I feel like everyone stores Thin Mints in their freezer and you can totally do that with this homemade version too! They should last 3 months in the freezer… but I bet they’ll be gone before then! 😉
More Girl Scout Inspired Treats
- Healthy Tagalongs
- 4-Ingredient Samoas
- Do-Si-Dos
- Samoa Energy Balls
- Date Caramel Apple Slices
- Banana Samoas Cookies
If you enjoyed this recipe, please consider leaving a ⭐ star rating and let me know how it went in the 📝 comments below.
Homemade Thin Mints
Ingredients
Cookies
- 1 cup almond flour
- 2 Tablespoons cocoa powder
- 2 Tablespoons maple syrup
- 2 Tablespoons melted coconut oil
- Pinch of sea salt
- ½ teaspoon peppermint extract
Chocolate Coating
- 1 cup dark chocolate chips, I like using Lily’s dark chocolate chips to keep these low-sugar
- 2 teaspoons coconut oil
- ¼ teaspoon peppermint extract
Instructions
- Combine almond flour, cocoa powder, maple syrup, coconut oil, sea salt and peppermint extract in a medium bowl until dough forms. The mixture might seem a little crumbly, but that’s okay. Place dough in the fridge for about 15 minutes.
- While the dough is in the fridge, preheat your oven to 350°F and prep a baking sheet by lining it with parchment paper.
- Place the chilled dough on a piece of parchment paper. Cover it with a second piece of parchment. Pat it down with your hands and then use a rolling pin to roll out the dough. You’ll want the dough semi-thin— about 1/4 of an inch thick.
- Use a small circular cookie cutter to cut out circular cookies and place each on your prepared baking sheet. I used a shot glass for this and it worked great.
- Place cookies in the pre-heated oven and bake for 10-15 minutes. Watch them closely because the timing depends on thickness of your cookies. Remove from the oven and let cool completely.
- Melt chocolate by adding your chocolate chips and coconut oil into a small bowl. Melt in the microwave using 30-second increments or use a double boiler. Once chocolate is melted, stir in the peppermint extract.
- Using a fork, dip cookies into the melted chocolate. Let any excess chocolate drip off before placing the cookie back on the parchment lined baking sheet.
- Place cookies in the fridge or freezer for the chocolate to set, about 30 minutes. Once the chocolate has set, you’re ready to enjoy! Store leftover cookies in the freezer and enjoy straight from the freezer – no need to thaw.
Video
Notes
- Almond flour: You can use all-purpose flour or oat flour as a substitute for the almond flour. If you do use all-purpose flour, you’ll need to add a touch of liquid as the dough turns out quite dry. I added 1 Tablespoon of almond milk and it worked perfectly.
- Maple syrup: You can sub this for any liquid sweetener of your choice like honey, agave, monk fruit maple syrup, etc.
- Coconut oil: This is used to help make the melted chocolate thinner, which makes it easier to dip the Thin Mints. You can skip it, but your melted chocolate will likely be pretty thick. I recommend using refined coconut oil if you don’t want any coconut flavor!
- Peppermint extract: Peppermint oil should work just fine, but the oil is much more concentrated than extract, so you probably will only need a few drops.
Nutrition
Nutrition information is automatically calculated, so should only be used as an approximation.
Like This Recipe? Rate & Comment Below!


You should send these recipes to Girls Scouts of America. The things they put in their cookies are an abomination. Thank you for putting healthier, delicious recipes into the world.
You are so sweet! Thank you so much, Hayley! I am so glad you are loving these healthier girl scout cookies recipes, truly means so much to me. ❤️
I doubled the recipe and this didn’t get doughy at all…I’m a little confused
Oh no! Is is just runny? to just really soft?
I used Gluten free Flour and the cookie came out chewy with an air pocket but they still tasted great. I actually preferred the chewy for sensitive teeth reasons. Loved this recipe both ways!
Ahh this is so great, Luka. I am so glad you’re glad you’re loving this recipe and it turned out great for you with the GF flour. Thanks for sharing your review + star rating, it means so much to me!
I make these often and quite often omit the choc icing/topping. They are delicious as is and store in an airtight container in the pantry perfectly. Great recipe Thank You
YUM! I am glad you’re enjoying this recipe, Marian. Thank you for sharing your review & star rating, it means so much to me!
Can you use liquid coconut oil for the recipe?
Yes! That should work great. Hope you enjoy these cookies!
These are soooo good! I doubled the peppermint extract and for the chocolate coating, I used a cup of cocoa powder, a cup of cacao butter, a third cup of honey, and about a tsp of peppermint extract (I probably should only have made about 1/4 the amount haha) But this is a new favorite recipe for my family, these are amazing! Love the crumbly texture in particular. Yum! Thank you for the excellent recipe!
Delicious! I am excited to hear that you and your family and loving this recipe and that it turned out great for you. Thank you for sharing your review + star rating, I really appreciate it!
These are delicious treats!!! Will absolutely be making these all year long!
Yay! I am so glad you are loving these cookies, Gretchen. Thank you for sharing your review + star rating, I appreciate it!
What can I say but YUMMMM!! These are so perfect! I’ll definitely be making these again!!
Perfect! I am so glad you are loving these cookies, Erica. Thank you for your review + star rating, I really appreciate it!
Brittany, these were absolutely fantastic!
Yay! I am so glad these are a hit, Elise! Thank you for your review + star rating, I appreciate it!
Made a double batch today. All seven of us in the family loved them. The crumbly texture of the almond flour is marvelous. I will absolutely be making them again!
PS: the tip about using a fork to dip the cookies was amazing!!!!! worked so well!
WOO! I am excited to hear that you and the family are loving these cookies, Martha. Thank you so much for sharing your review + star rating, I really appreciate it!