
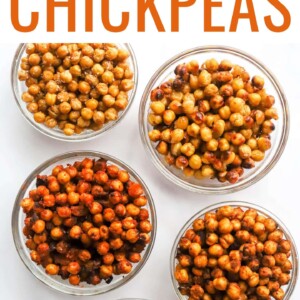
Air Fryer Chickpeas (5 Ways)
This post may include affiliate links. Thank you for your support.
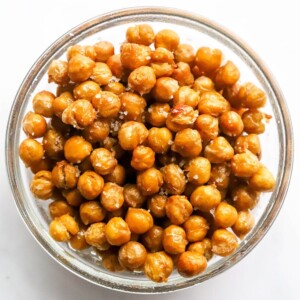
These crispy air fryer chickpeas are crunchy, delicious and cook up in under 15 minutes. They’re great for snacking or topping salads and with the five different flavor options you’ll never get bored.

I’ve been on an air fryer kick lately, whipping up everything from air fryer coconut shrimp to air fryer tofu — and now, these air fryer chickpeas are taking center stage! They’re super quick to make and so perfectly crispy, you’ll be reaching for handful after handful in no time.
Table of Contents
Why You’ll Love These Crunchy Chickpeas
- Easy to prep – Just add your chickpeas to a bowl, toss in oil with your seasoning of choice and cook. You’ll have a delicious, crunchy snack in under 15 minutes!
- Minimal ingredients – All you need is one can of chickpeas, oil, salt and your seasoning of choice.
- Customizable – The basic variation with just salt is delicious or you can use any of the 4 flavors I have listed below. Feel free to also get creative with your seasonings.
Ingredients Needed
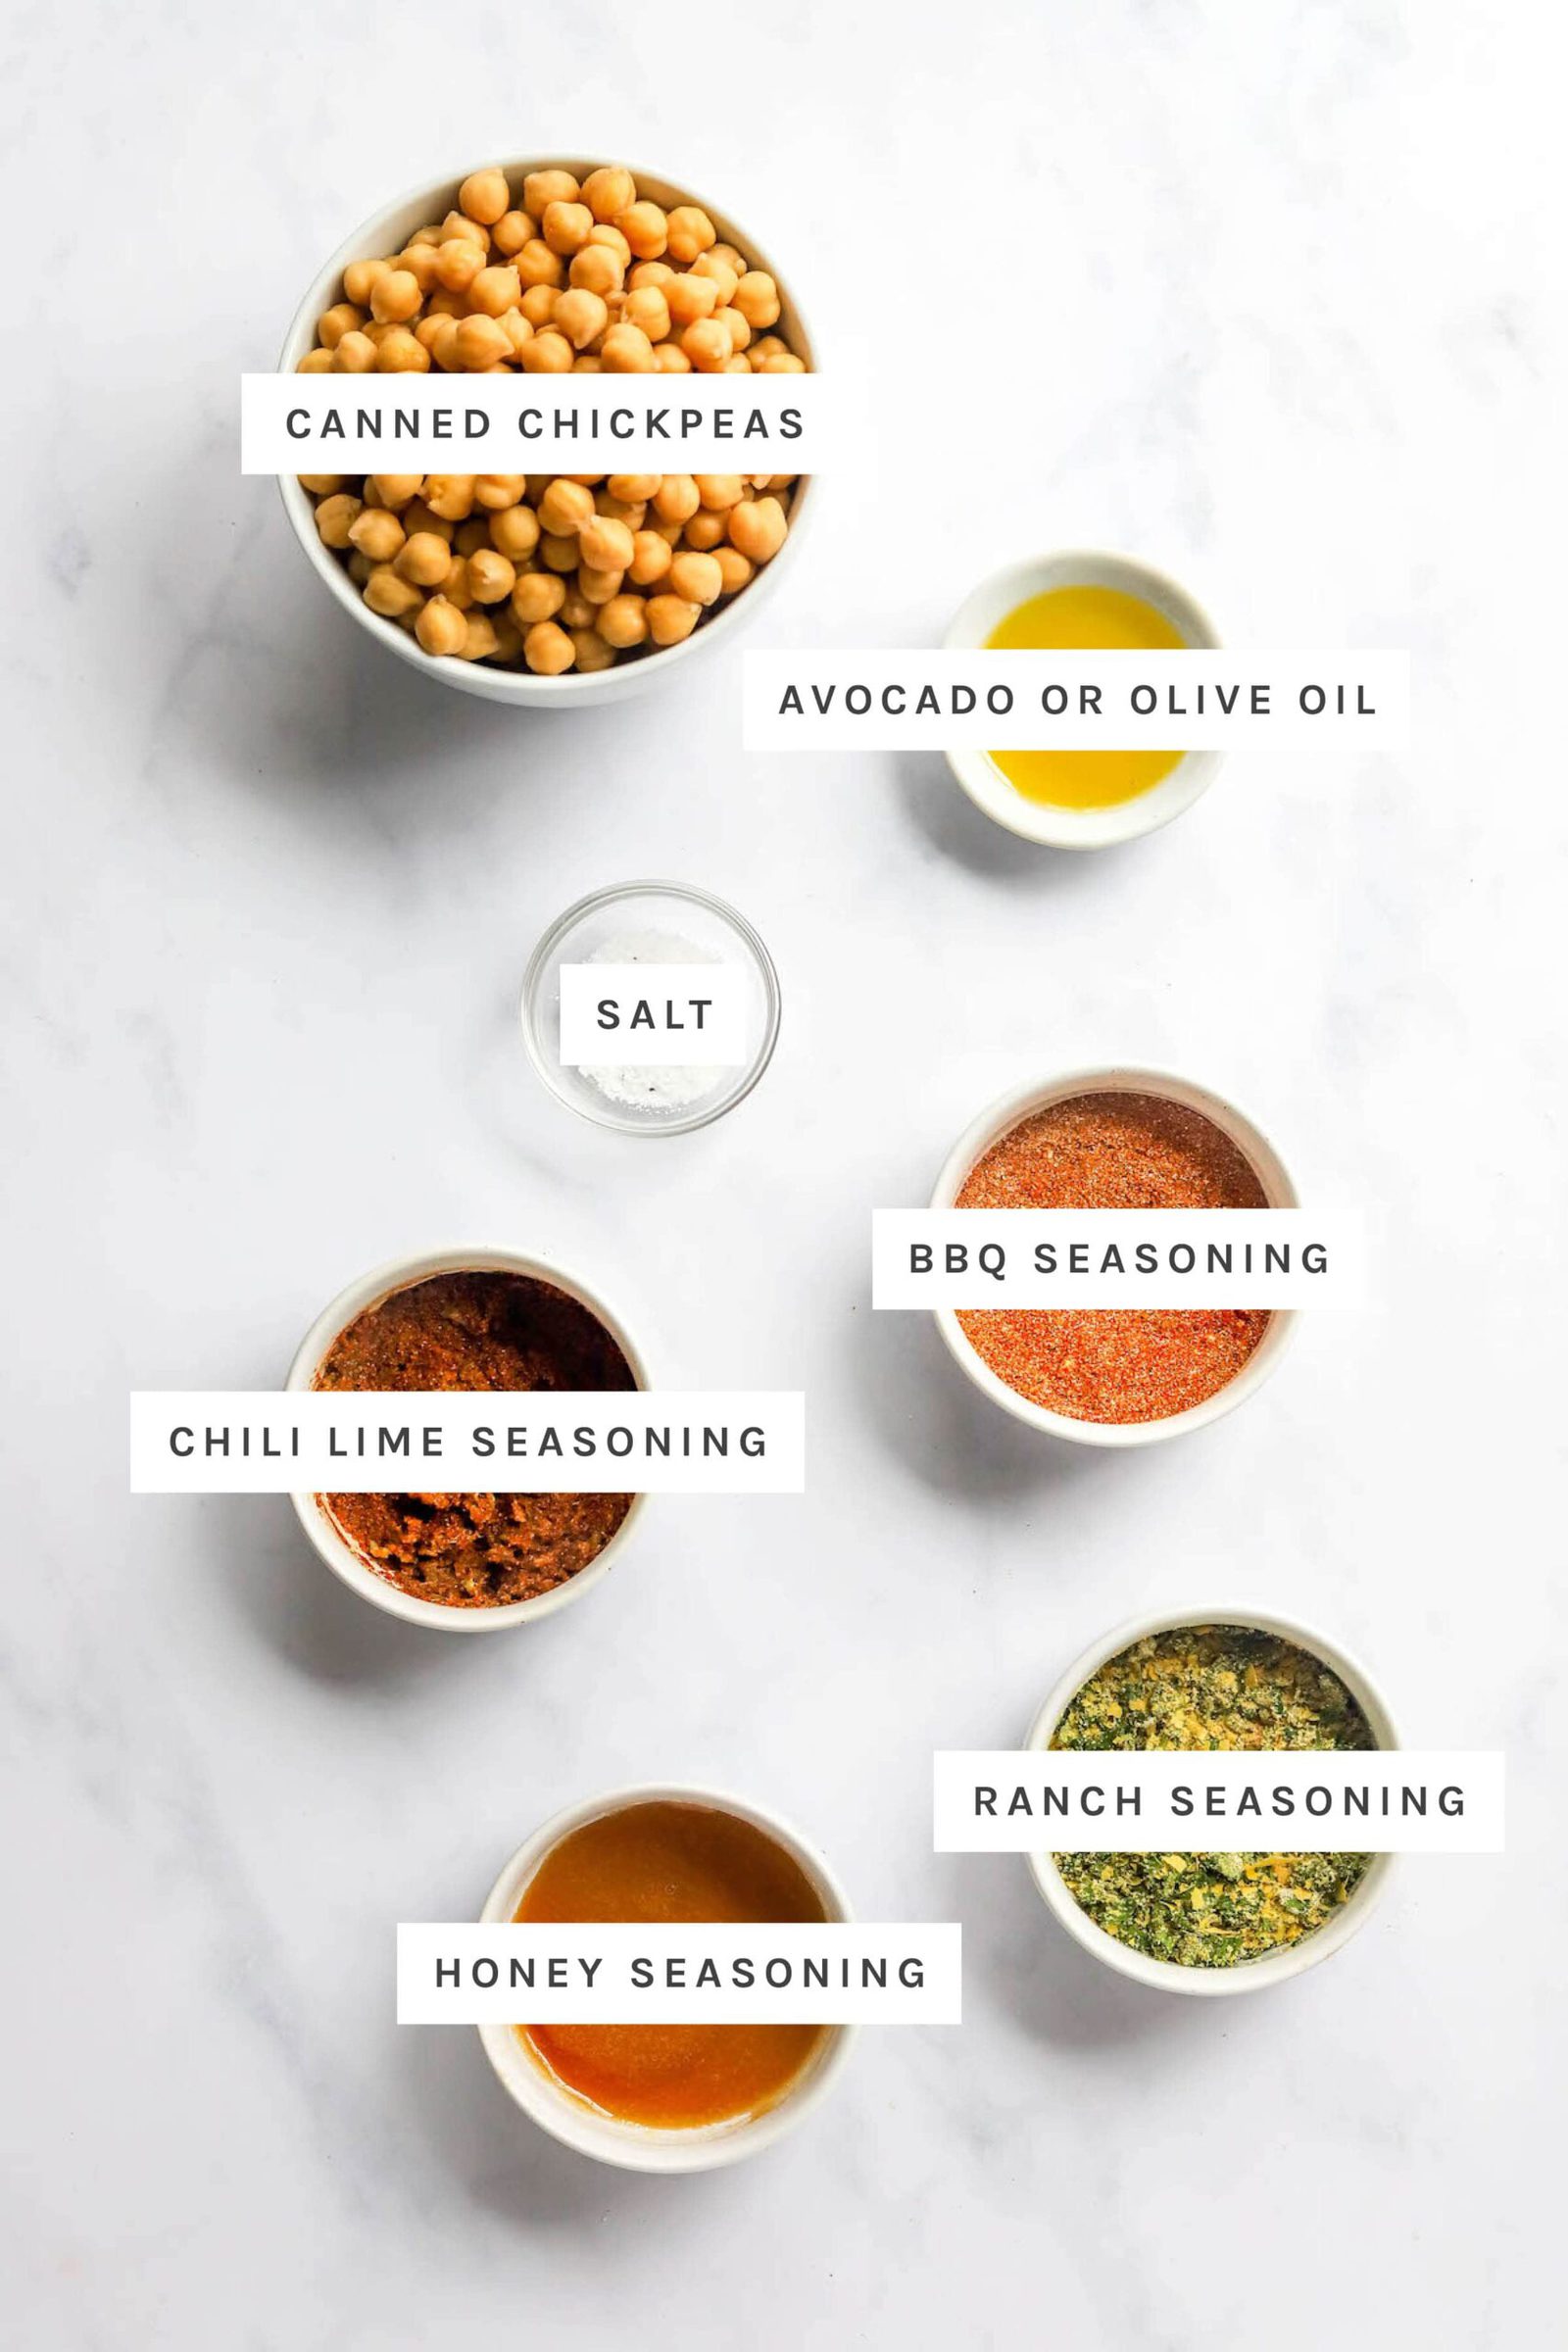
Like with most of my air fryer recipes this one requires just a few simple ingredients that you probably already have in your kitchen:
- canned chickpeas – also known as garbanzo beans. After draining and rinsing your canned chickpeas, you’ll pat them dry, coat with a little oil and seasonings of choice. Then you’ll air fry them until crisp and crunchy!
- olive oil or avocado oil – to help the seasonings stick and make the chickpeas extra crispy!
- salt – we’re using just salt as the seasoning for the basic variation, but it’s also used in the other seasoning combos to help bring all the flavors together.
- seasoning of choice – feel free to get creative here, but see below for my faves!
Find the full ingredient list with measurements in the recipe card below.
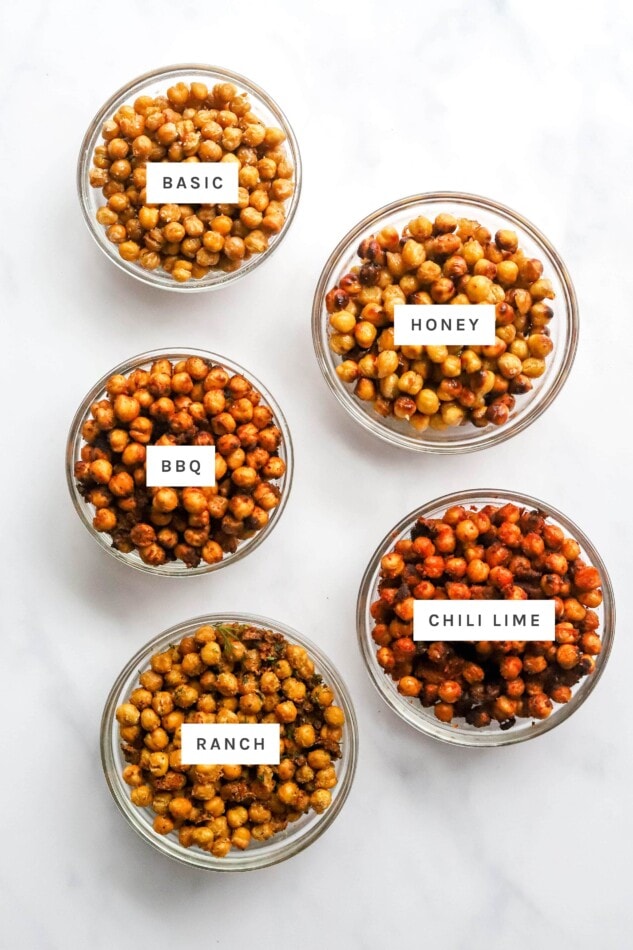
Flavor Variations
The flavor variations are endless when it comes to air fryer chickpeas, but below I’m sharing my four go-to flavors: bbq, chili lime, ranch and honey!
- BBQ: If you’re all about that smoky, sweet BBQ goodness, this one’s for you! Think smoked paprika, garlic powder, and just a hint of sugar to bring out that irresistible flavor combo.
- Chili Lime: This zesty mix will bring your chickpeas to life! With chili powder, cumin, and a bright squeeze of lime juice, it’s got the perfect balance of bold and tangy. Trust me, you’ll be snacking on these non-stop!
- Ranch: Ranch is such a classic seasoning for savory snacks like chips and crackers and it works great on chickpeas too. I love all the herbs!This blend of dill, parsley, and chives gives your chickpeas all those familiar herby, savory flavors.
- Honey: Got a sweet tooth? These honey-coated chickpeas are the perfect sweet snack with just the right amount of crunch.
How to Make Air Fryer Chickpeas
This recipe couldn’t get any simpler! It only requires a few easy steps and comes together in about 15 minutes.
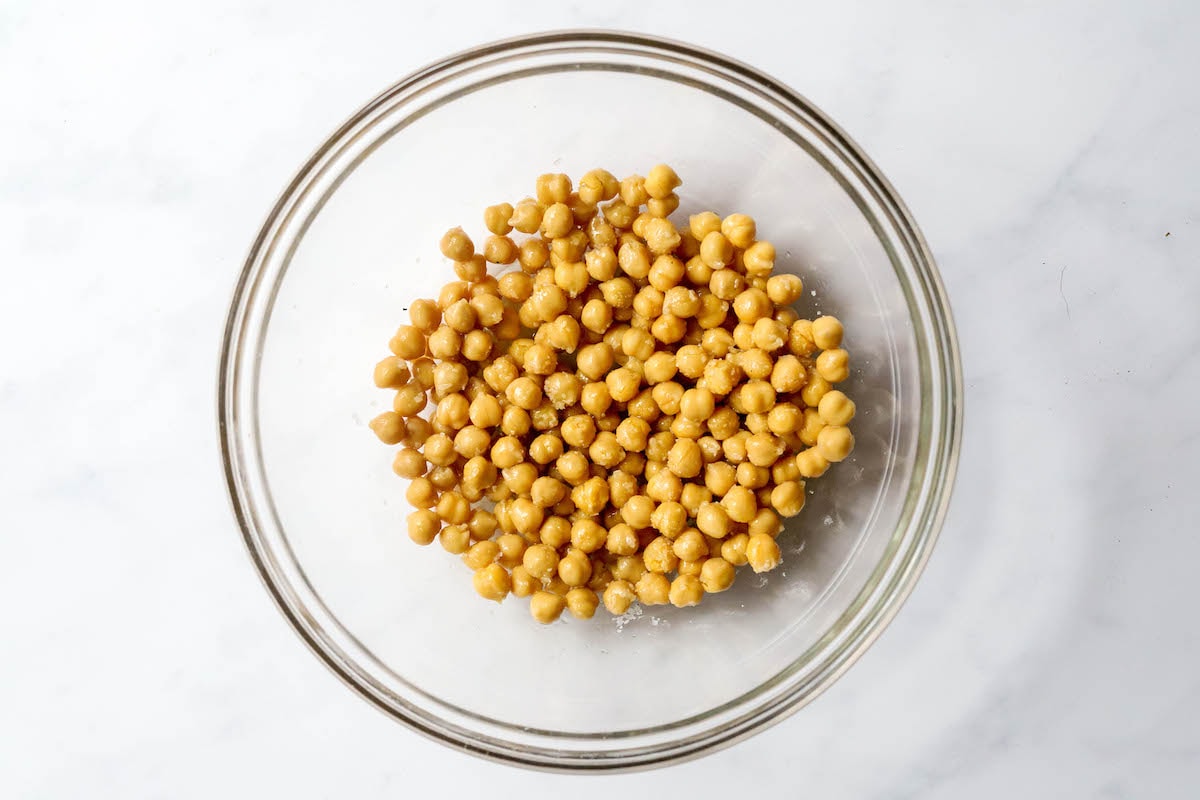
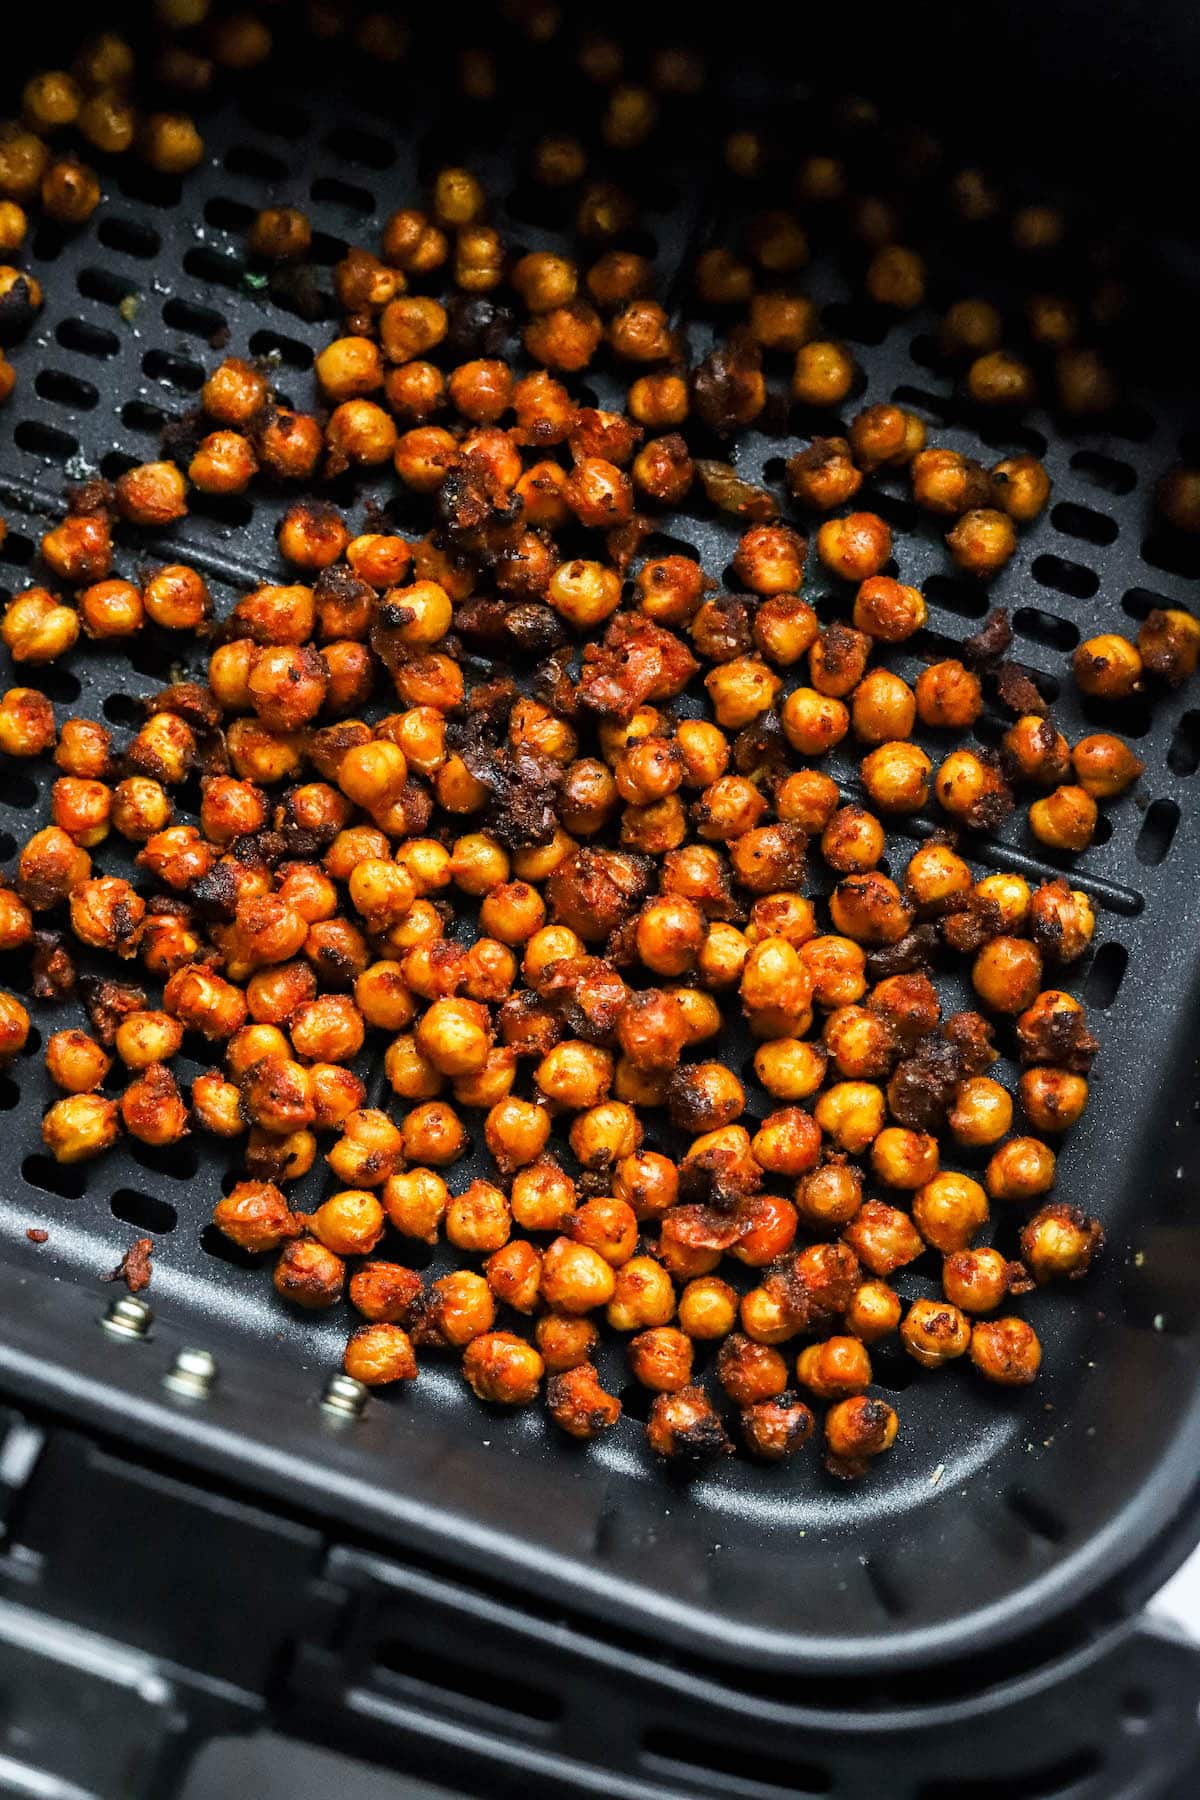
Step 1: Drain, rinse, and dry your chickpeas. Place them in a large bowl and add your seasonings of choice. Toss well to combine.
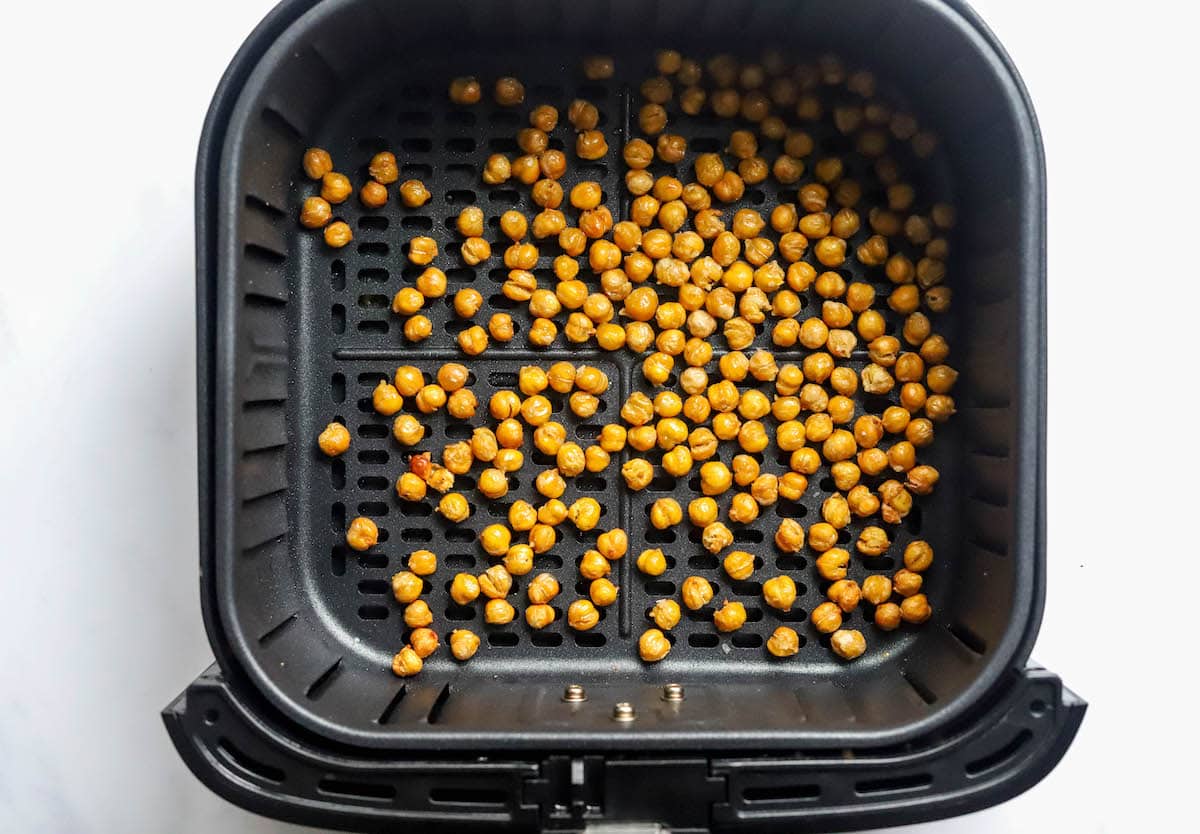
Step 2: Preheat air fryer if required. Place seasoned chickpeas in air fryer basket in a single layer and cook for 12-14 minutes.
Tips for Success
- Give the chickpeas space: If you’re doubling the recipe, make sure to cook in batches. Crowding them will make it harder for the chickpeas to get that perfect crunch.
- Dry them well: After rinsing the chickpeas, pat them dry with a paper towel to help them crisp up better during cooking. This little step makes a big difference!
How to Serve Chickpeas
I love eating these air fryer chickpeas by the handful for a snack, but you can use them like any roasted chickpeas – they would make for a great salad or soup topping! Here are some recipes that would be tasty topped with crispy chickpeas.
How to Store Air Fryer Chickpeas
After allowing the chickpeas to cool completely, store them in a bowl or container, not covered. This will help preserve their crispness. They should stay fresh for up to one week at room temperature. I don’t recommend storing these in the fridge as they will become chewy and less crisp.
FAQ’s
Yes! Air fryer chickpeas are definitely a healthy snack in my book! They’re low in calories, but still salty and crunchy making them a great replacement for chips. Plus, one serving is packed with 7 grams of protein and 5 grams of fiber.
If your chickpeas didn’t turn out as crispy as you’d hoped, there are two common culprits! Either they didn’t cook long enough, or your air fryer basket was a bit too crowded. You really want the chickpeas in a single layer with some breathing room to allow the hot air to circulate around them. Give them a little extra cook time or try splitting them into batches next time, and you’ll get that perfect crunch.
Totally! If your chickpeas lose some of their crispness after a day or two, pop them back in your air fryer for a few minutes to crisp back up!
More Popular Chickpea Recipes
- Creamy Hummus
- Sriracha Cauliflower and Chickpea Sheet Pan Meal
- Quinoa Chickpea Salad
- Greek Chickpea Salad
- Vegan Power Bowl
Other Air Fryer Recipes to Try
- Air Fryer Chicken Tenders
- Air Fryer Buffalo Cauliflower
- Air Fryer Coconut Shrimp
- Air Fryer Salmon Bites
- Air Fryer Carrots
Be sure to check out all of the air fryer recipes here on EBF!
If you enjoyed this recipe, please consider leaving a ⭐ star rating and let me know how it went in the 📝 comments below.
Air Fryer Chickpeas (5 Ways)
Ingredients
Basic Recipe
- 1 15 oz can of chickpeas, drained and rinsed
- 1 Tablespoon avocado or olive oil
- ½ teaspoon salt, plus more to taste
BBQ
- 2 teaspoons coconut sugar or brown sugar
- 2 teaspoons smoked paprika
- 1 teaspoon garlic powder
- 1 teaspoon onion powder
- ½ teaspoon mustard powder
- ¼ teaspoon black pepper
- ¼ tsp cayenne, optional
Chili Lime
- 2 teaspoons chili powder
- 1 teaspoon cumin
- ½ teaspoon garlic powder
- Juice from 1 medium lime, about 2 teaspoons
- Zest from 1 lime, about 1 teaspoon
Ranch
- 1 Tablespoon nutritional yeast
- 1 teaspoon dill
- 1 teaspoon parsley
- 1 teaspoon chives
- 1 teaspoon garlic powder
- 1 teaspoon onion powder
- ¼ tsp pepper
Honey
- 1 Tablespoon honey
- 1 Tablespoon granulated sugar
Instructions
- Drain, rinse and pat chickpeas dry with a paper towel.
- Add chickpeas to a large mixing bowl with oil and salt and toss to combine. Move on to Step 3 if you’re making the basic sea salt version. For any of the other versions, add the additional seasonings and toss to combine, then move on to Step 3.
- Preheat air fryer if required. Place chickpeas in air fryer basket in a single layer and cook on 400°F for 12-14 minutes, tossing once halfway until golden brown and crispy. Keep an eye on the chickpeas towards the end to make sure your seasonings don’t burn!
- Once chickpeas are cooked to your liking, remove them from the air fryer and season to taste. Serve immediately or let cool completely and store in a bowl, not covered.
Notes
- Storage: Let the chickpeas cool completely, then store them in an uncovered container at room temperature for up to a week. Avoid storing in the fridge to prevent them from becoming soft.
- Substitutions: Swap out the honey for maple syrup or agave syrup for a sweet vegan version. Just make sure to coat the chickpeas after air frying to keep them crispy!
Nutrition
Nutrition information is automatically calculated, so should only be used as an approximation.
Equipment
Like This Recipe? Rate & Comment Below!


This is a keeper to the person that wondered if you could cook it in an air fryer oven. I have the Cuisinart toaster oven/air fryer/grill. They turned out perfect I said it at 400°.cook it in an air fryer oven. I have the Cuisinart toaster oven/air fryer/grill they turned out perfect I said it at 400° and preheated and I use the honey and sugar.
After reading all the reviews, I made sure they were completely dry. I will most definitely make this again.
Not sure how healthy the honey and sugar is, although I did use Splenda, it has to be more healthy than a chocolate chip cookie😂
Yay! I’m so glad the air fryer oven worked well for you, Christine. Love that you made sure the chickpeas were nice and dry — such a great tip. And hey, honey and sugar definitely still beat a cookie when you’re craving something crunchy. Thanks so much for making the recipe and for coming back to leave a review, I really appreciate it!