
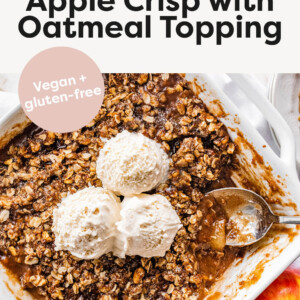
Healthy Apple Crisp
This post may include affiliate links. Thank you for your support.
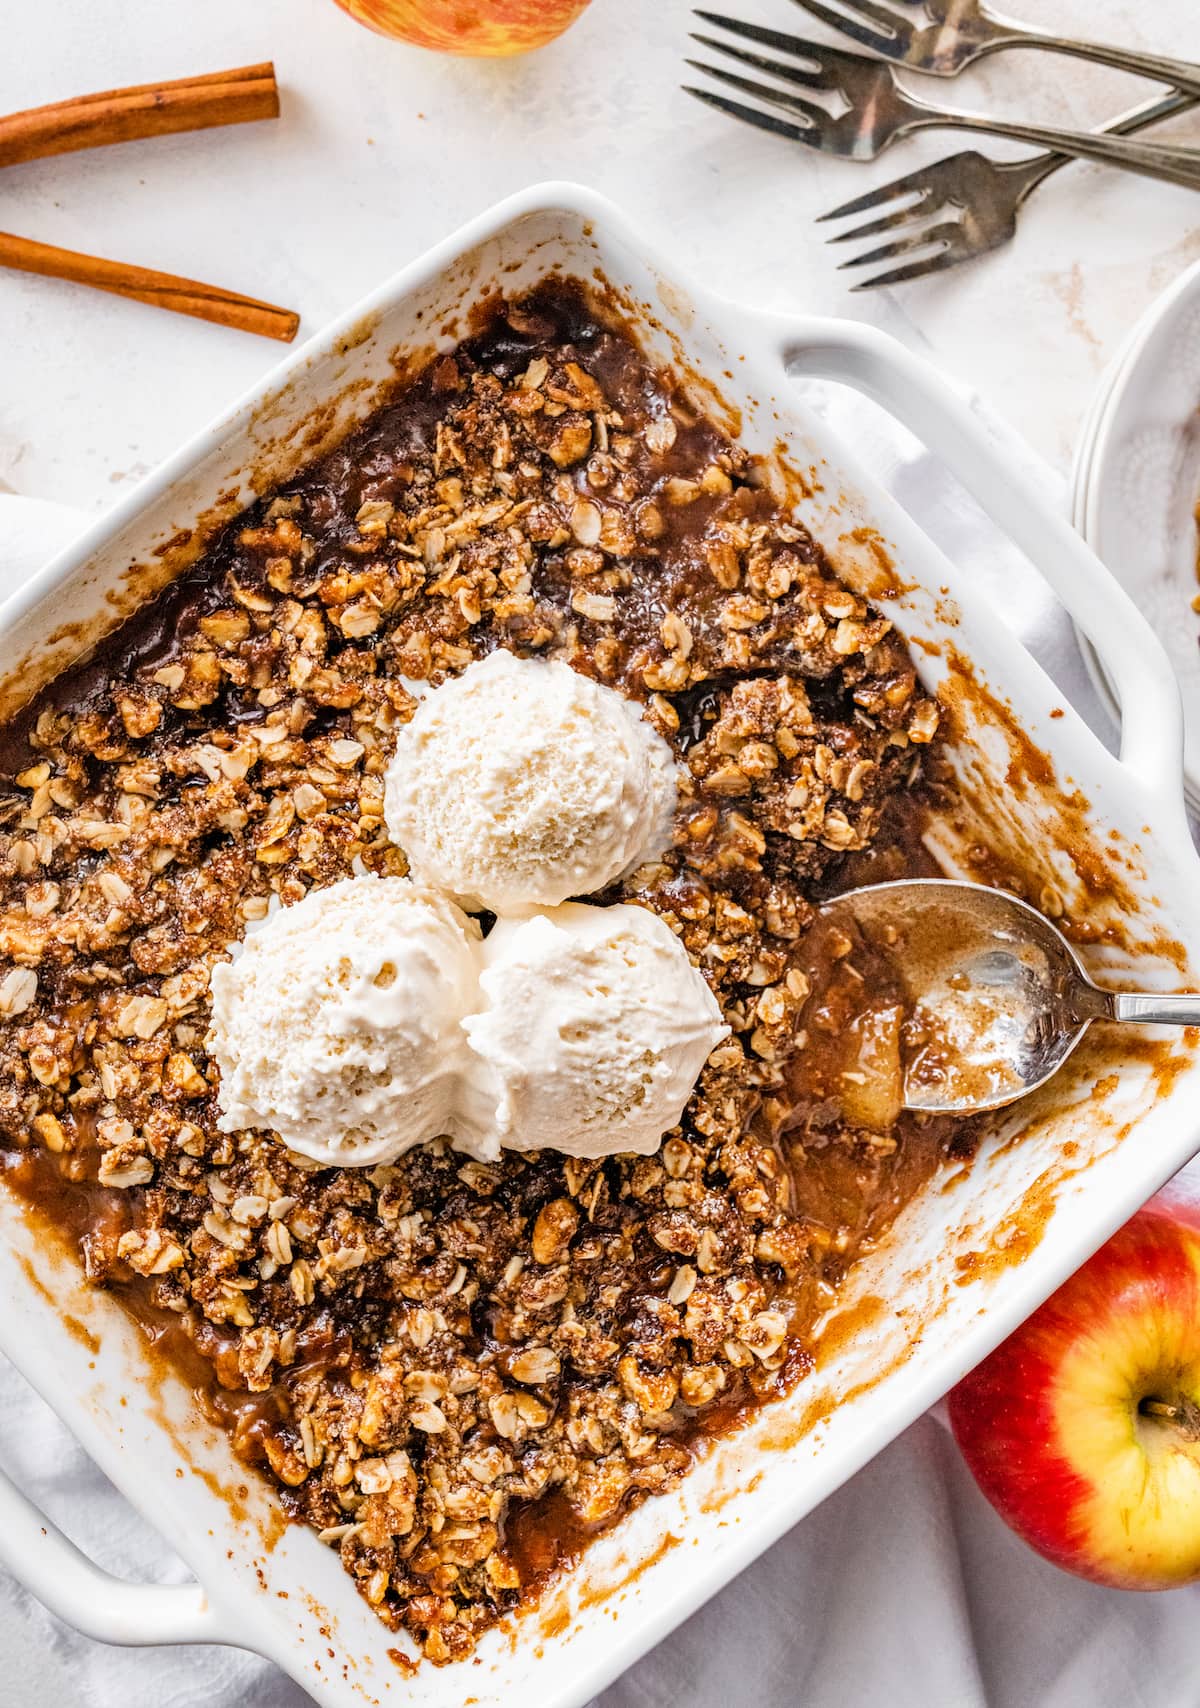
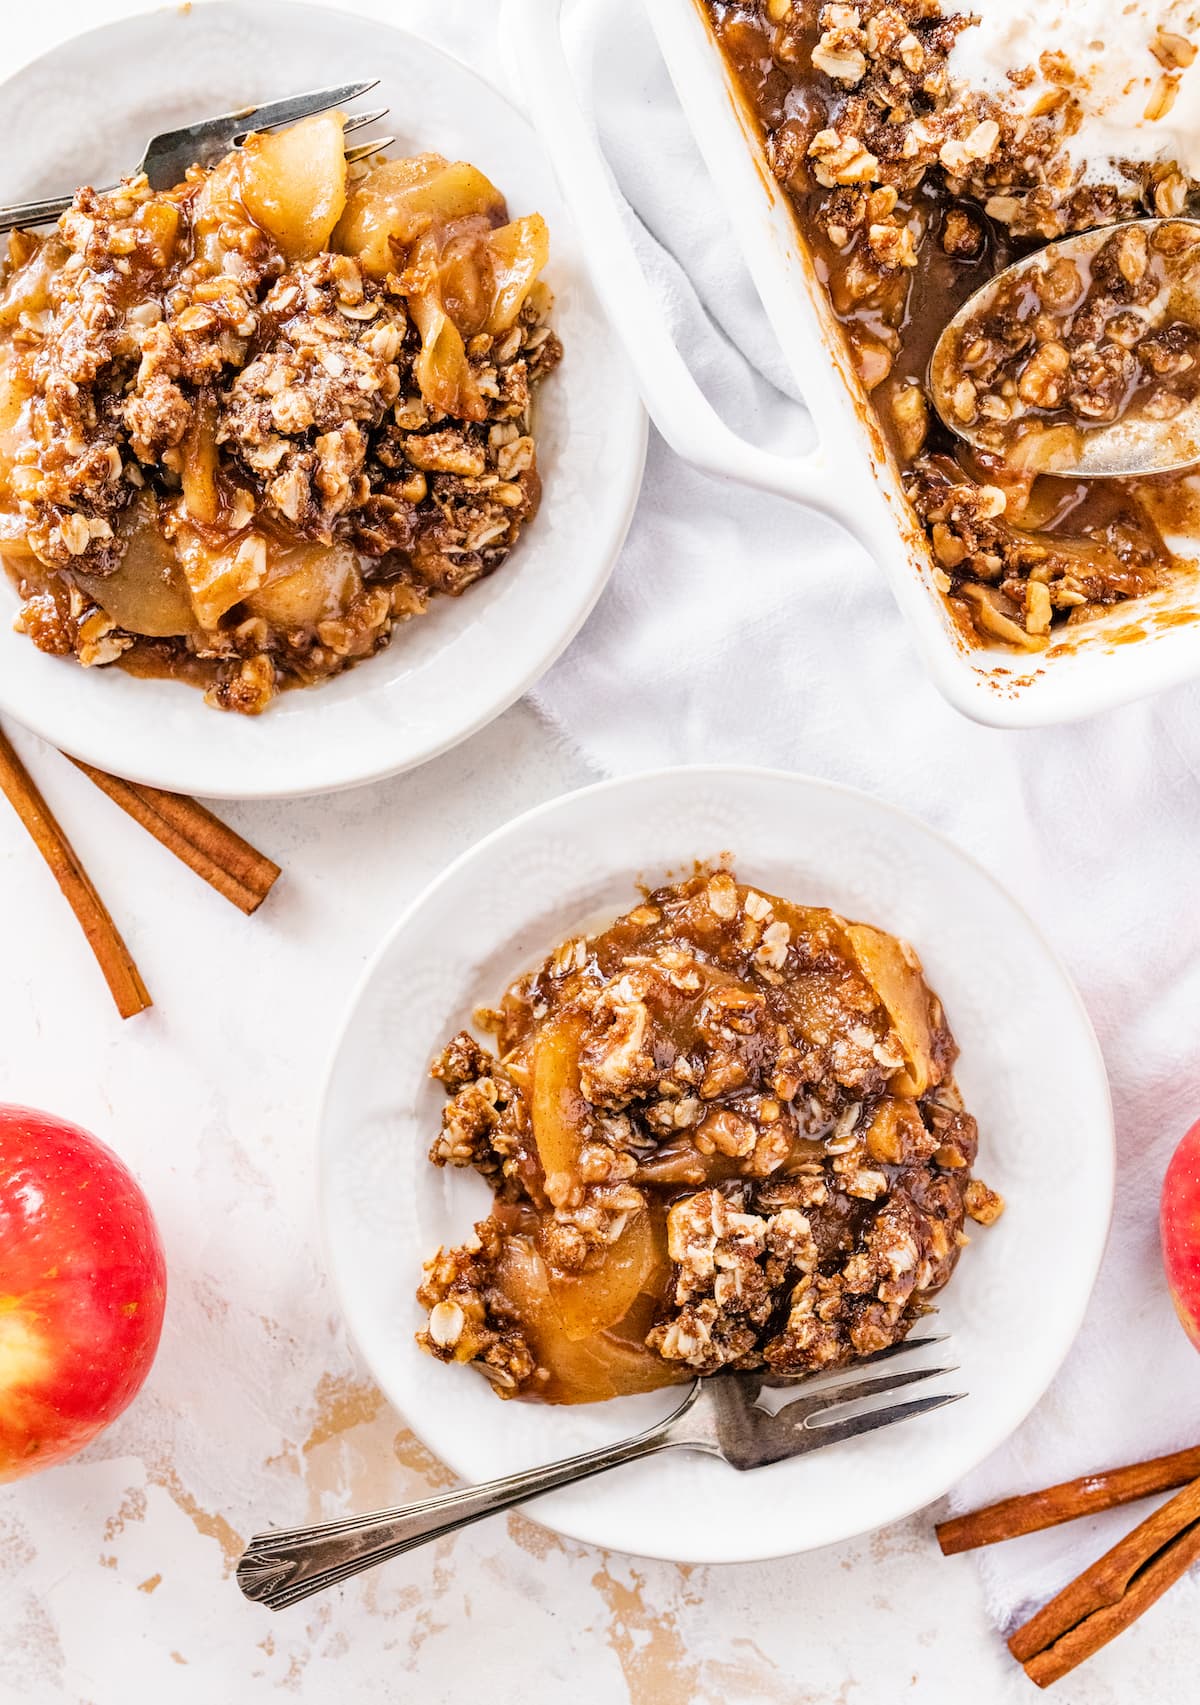
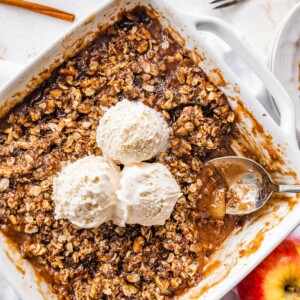
Healthy apple crisp sweetened with maple syrup and topped with a crunchy oatmeal pecan mixture. This easy recipe is naturally gluten free and vegan.
What do you make when you come home with way too many apples after a fun day of apple picking? A big pan of this healthy apple crisp!
I’ve been making this recipe for years and it always hits the spot. It’s simple enough for a weeknight dessert during the fall months, and it’s one of my favorite treats to share at Thanksgiving next to my pecan pie.
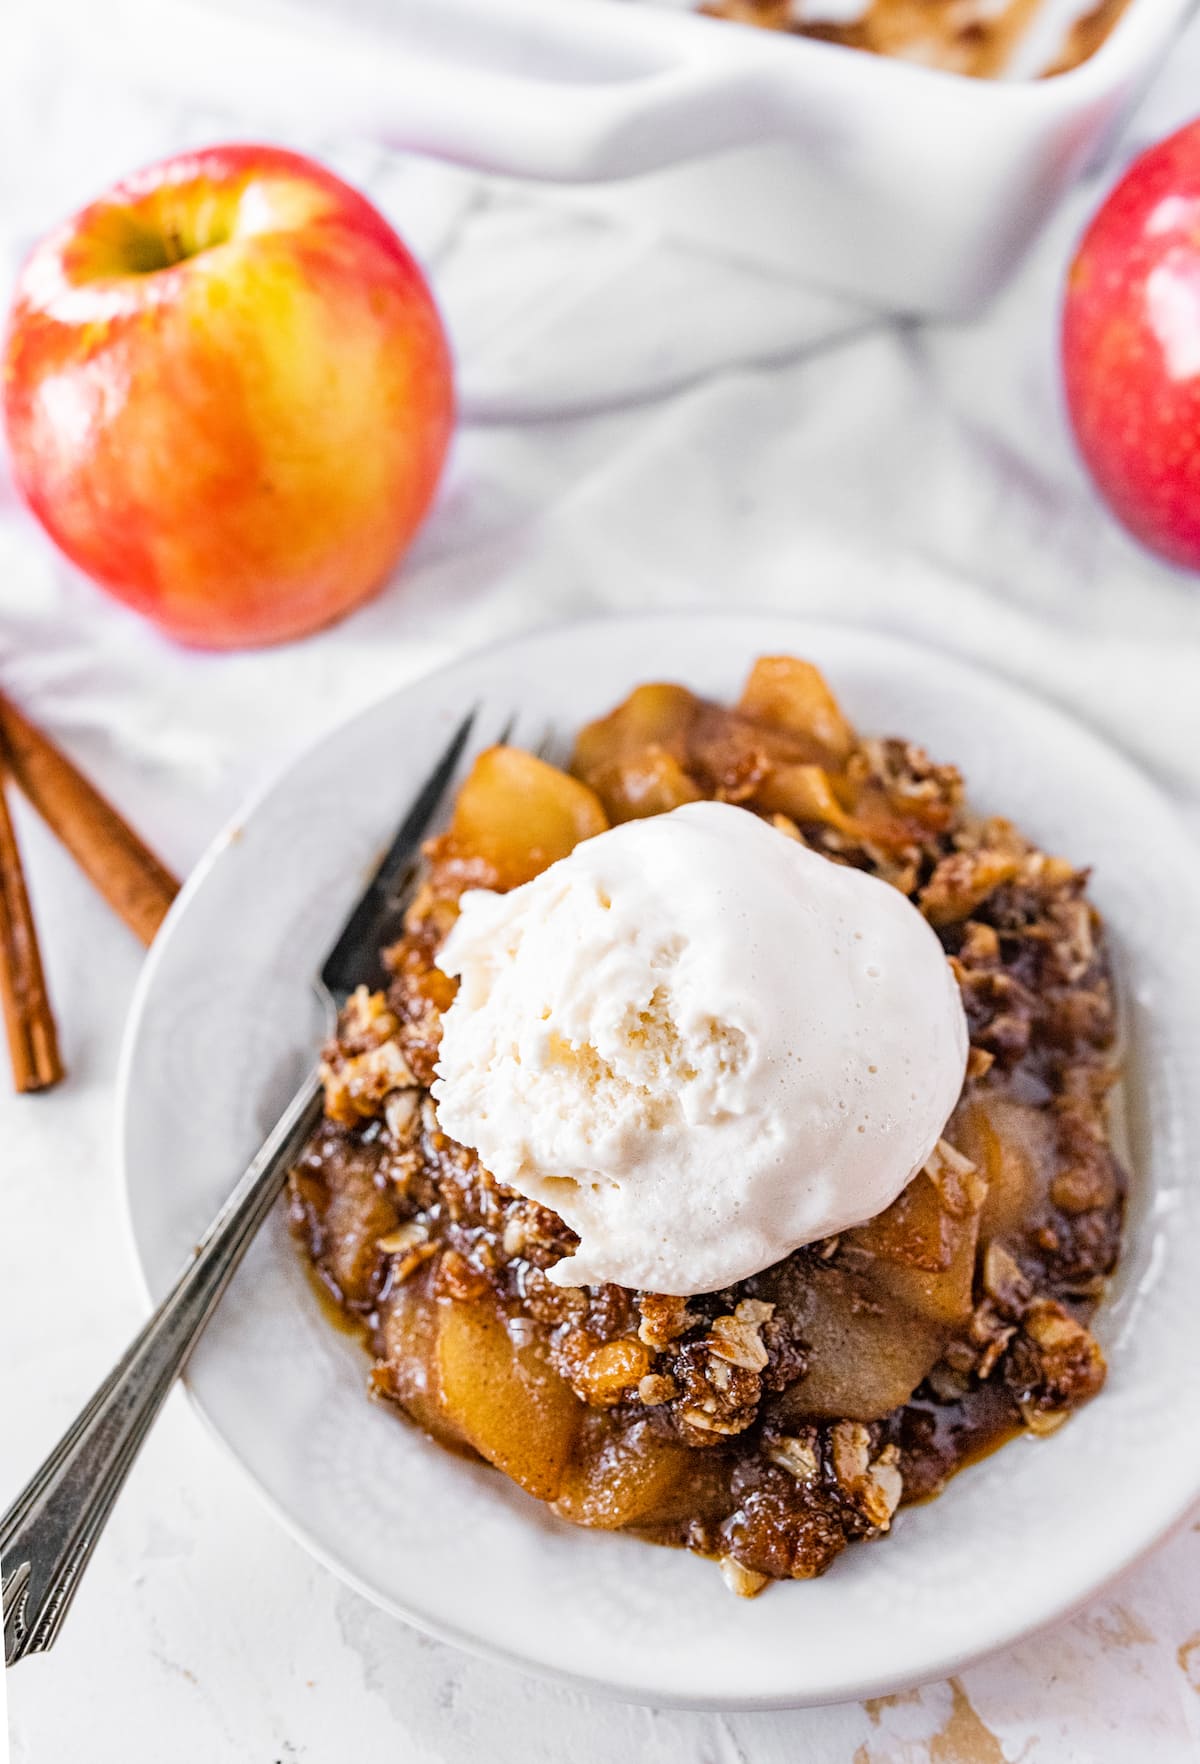
The apples bake until soft and caramel like while the oatmeal pecan topping turns golden and crisp. The apples are great, but that topping is the real star.
“I made this for Thanksgiving and even the guests who don’t have allergies were raving about it! This dessert will be making an appearance at all future gatherings in out home. Thank you, EBF!”
Why I Love This Apple Crisp Recipe

- Healthier twist – This crisp is naturally sweetened with maple syrup and coconut sugar which gives the apples a rich warm sweetness without being heavy.
- Diet friendly – It’s naturally vegan gluten free and dairy free so it works for most everyone at the table.
- So good – The apples bake until soft and warm while the oatmeal pecan topping turns crisp and golden. It’s amazing with a scoop of ice cream.
Ingredients Needed
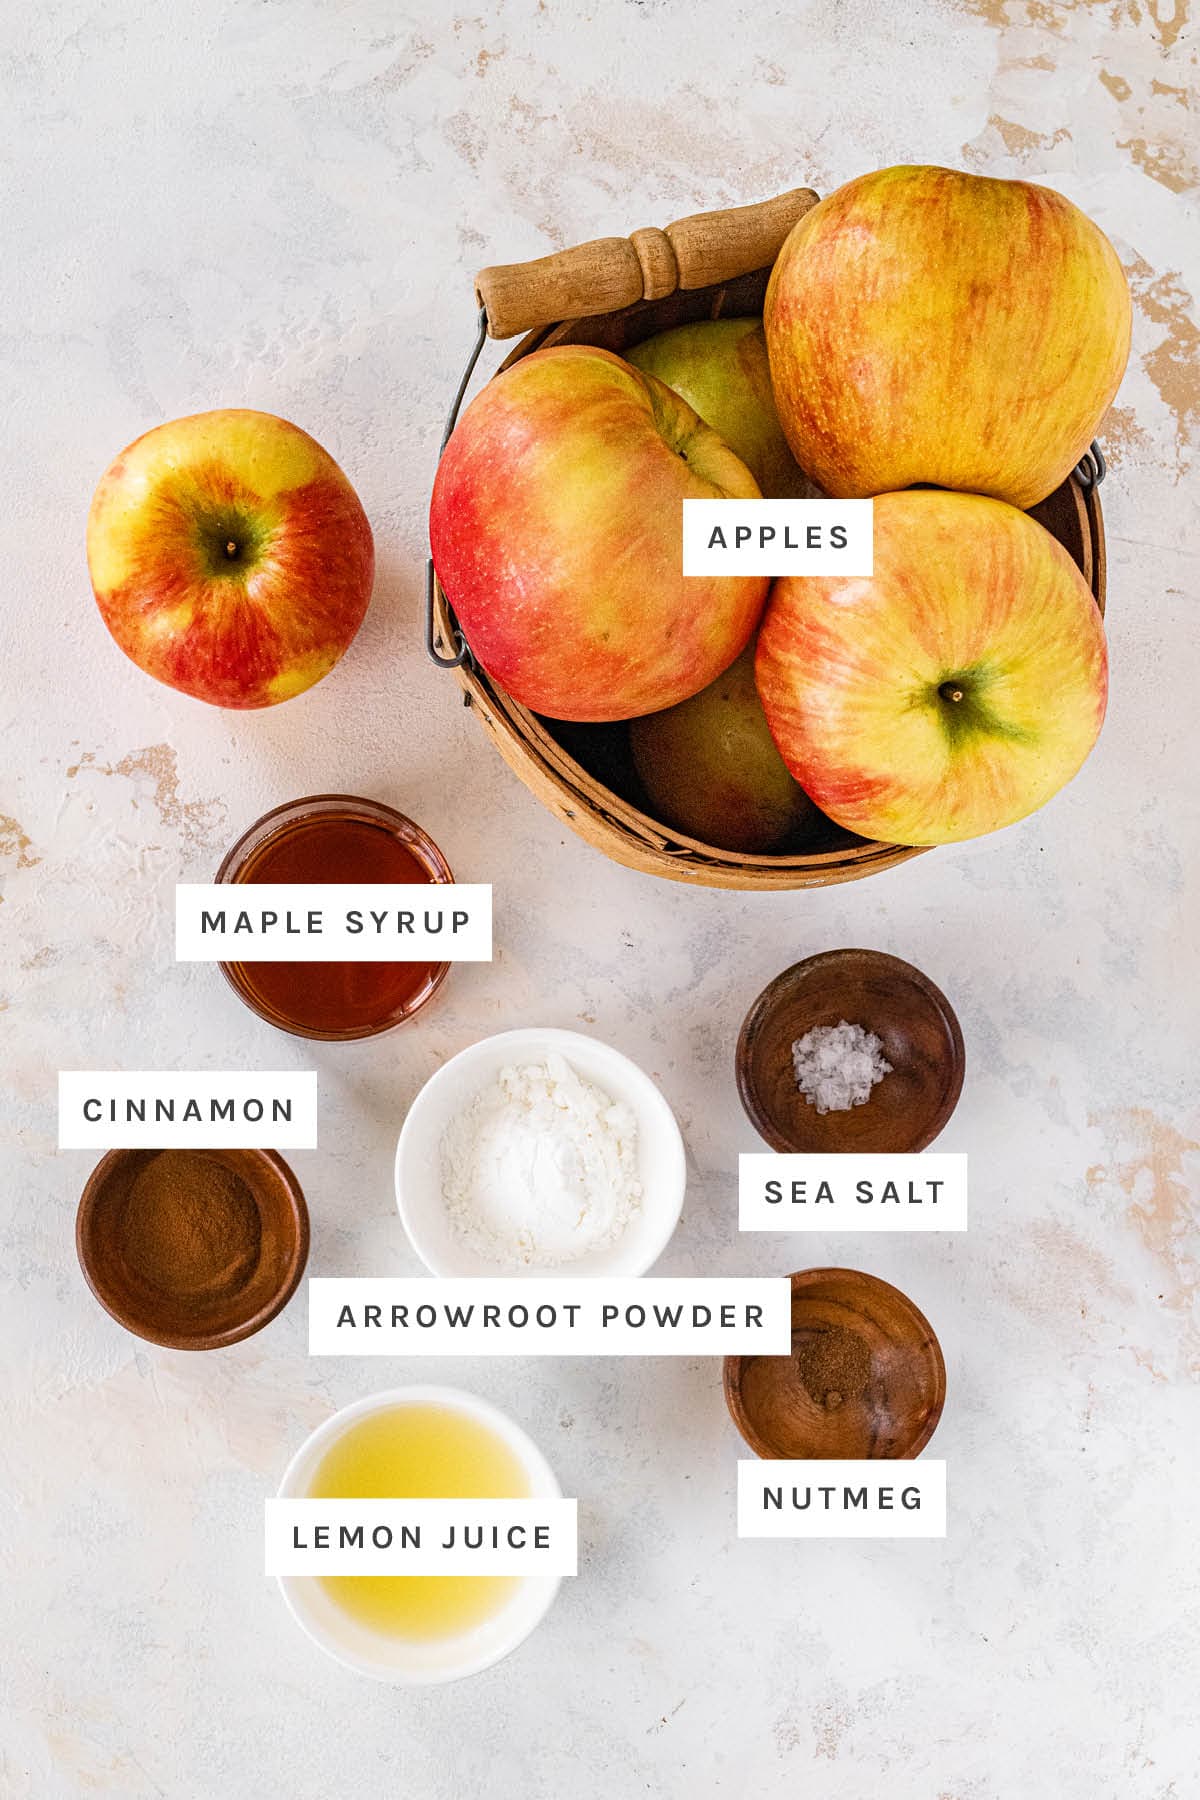
Filling
- apples – the star of the show here! I like using a combination of tart and sweet apples. My favorite varieties are Pink Lady and Honeycrisp apples!
- arrowroot powder – helps thicken the apple mixture.
- maple syrup – just a little bit of added natural sweetness for the apple mixture.
- lemon juice – brightens the apples and helps keep the color fresh.
- seasonings and spices – cinnamon, nutmeg and sea salt add warmth and balance.
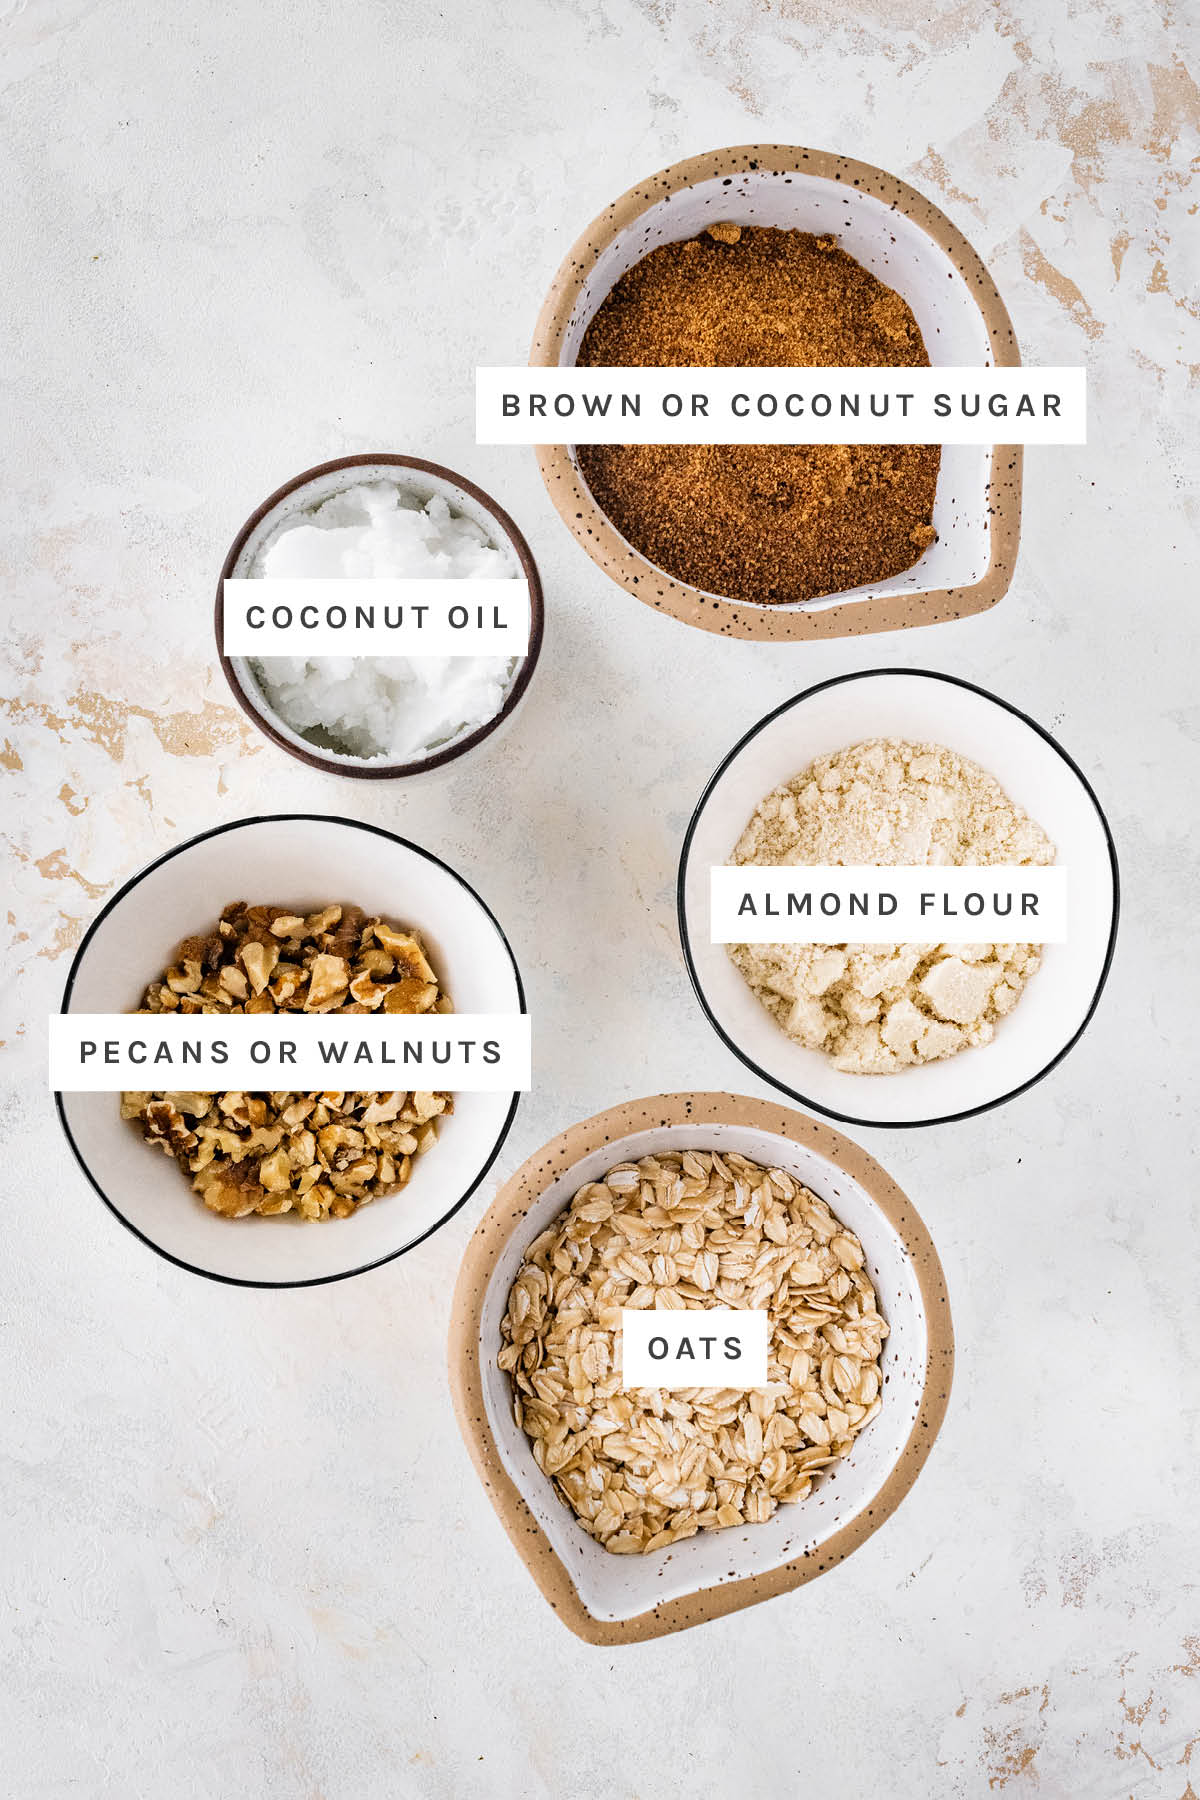
Crumble Topping
- coconut sugar – I love using coconut sugar because of the unique caramel taste it has and because it’s naturally low on the glycemic index.
- old-fashioned rolled oats – help create a crisp topping that bakes up golden. I like using Bob’s Red Mill gluten free old fashioned rolled oats.
- almond flour – we’re using almond flour to keep this recipe gluten-free.
- chopped nuts – add crunch and a rich nutty flavor to the crisp.
- coconut oil – keep the coconut oil in solid form to help make the topping more crumb-like.
How to Make Healthy Apple Crisp
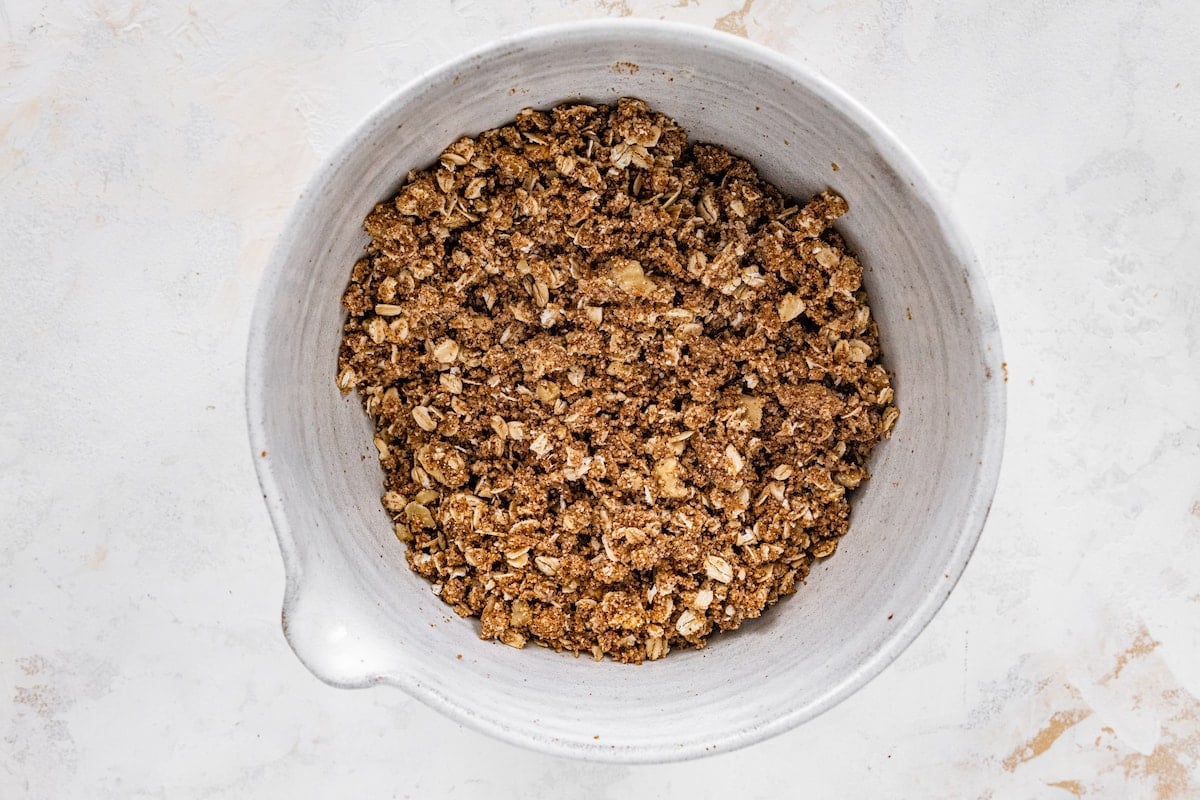
Step 1: In a medium bowl combine the sugar, rolled oats, almond flour and nuts. Add butter or coconut oil and combine until topping is crumb-like. Set aside.
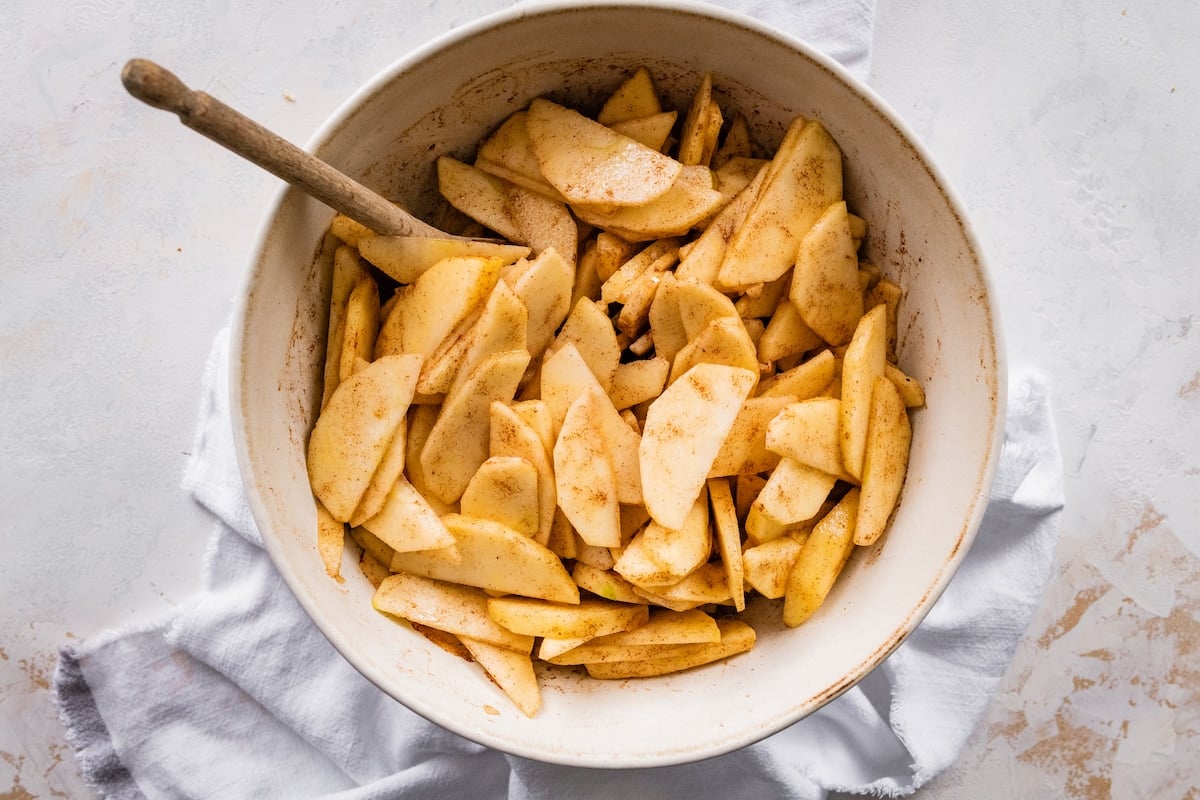
Step 2: Add apple slices to a large bowl with maple syrup, lemon juice, arrowroot powder, cinnamon, nutmeg and salt. Gently toss until all apple slices are coated.
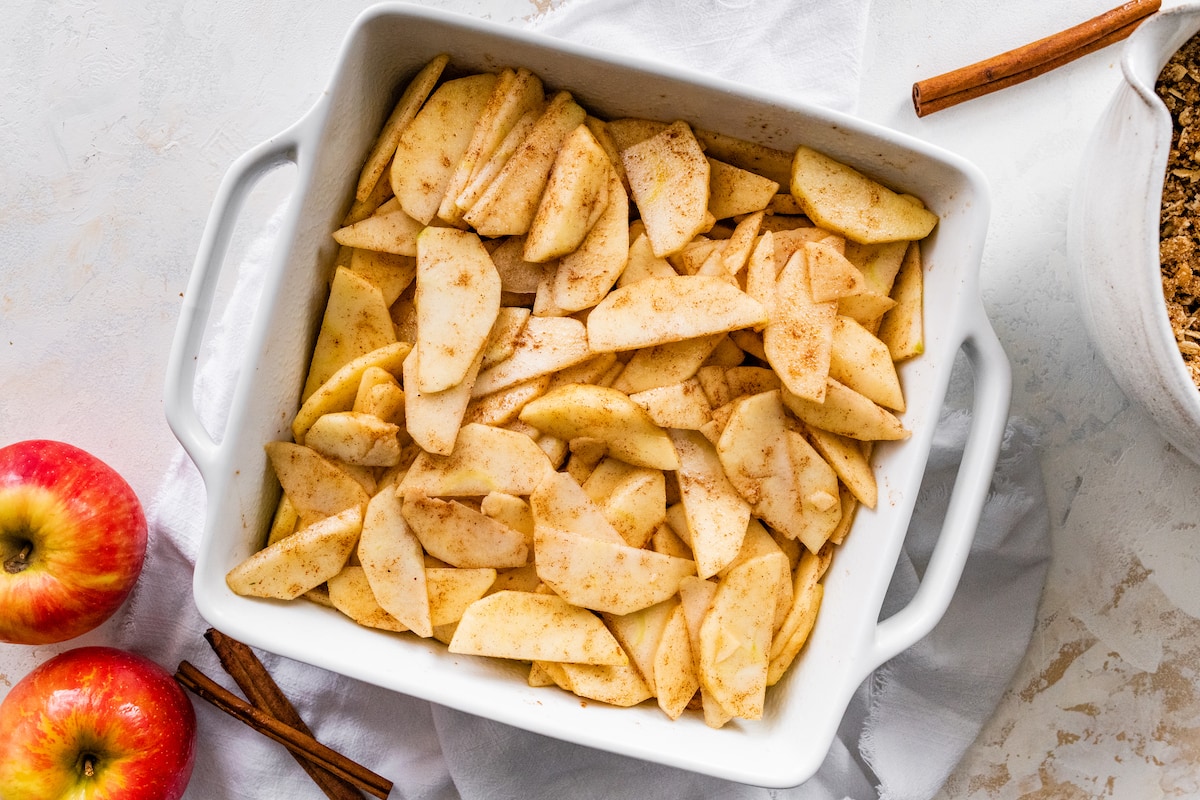
Step 3: Transfer apple mixture to greased 8×8 square baking pan or a 9-inch round pie pan. Sprinkle crisp topping over apple mixture.
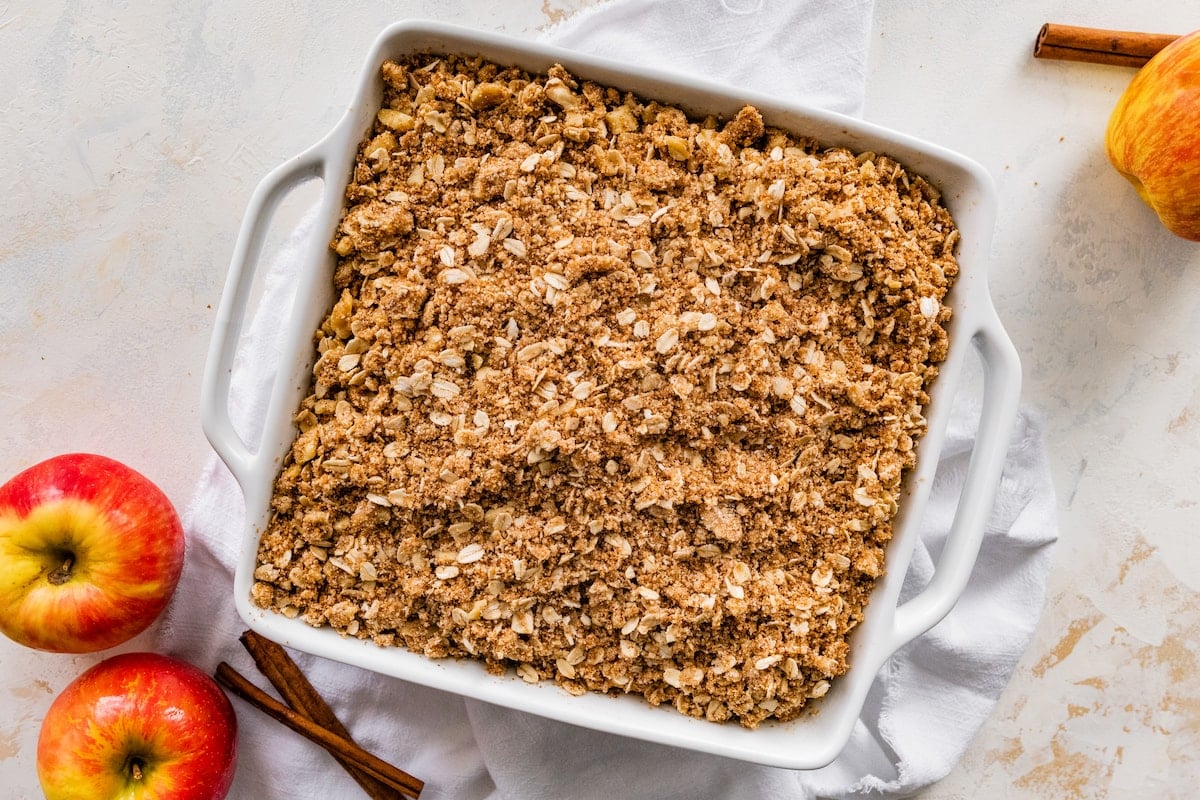
Step 4: Place baking dish in preheated oven and bake for 45-50 minutes or until the apple filling is bubbly and the top is golden brown.
Brittany’s Tips!
- Use softened coconut oil: To get that perfect apple crisp topping, make sure your coconut oil is solid but not rock hard. If your kitchen is warm and the coconut oil is too soft, just pop it in the fridge for a few minutes before mixing!
- Use your hands: I like to use my hands to work the coconut oil into the dry ingredients until it forms pea-sized clumps. This gives you a deliciously crumbly topping that turns golden and crispy in the oven.
- Cover with foil: If you notice that your topping is browning too quickly in the oven, you can cover it with tin foil to prevent it from burning.
How to Serve Apple Crisp
Served warm, this apple crisp is absolutely delicious on its own, but if you really want the full experience I recommend serving it with some toppings. Here are some ideas:
- Ice cream – I love eating it with Halo Top Creamery vanilla ice cream, which is a low cal/low sugar ice cream that actually tastes pretty darn good! Or top this crisp with my banana ice cream for a tasty vegan option.
- Yogurt – Add creaminess and protein by adding yogurt as a topping! Pro tip: whip the yogurt in a food processor for a light and airy texture.
- Whipped cream – Can’t go wrong with classic whipped cream!
- Coconut whip – Looking for a dairy-free option? I love topping this apple crisp with coconut whipped cream.
- Caramel sauce – Want more caramel-y flavor? Drizzle my date caramel sauce over top.
How to Store Leftovers
At room temperature: Leftovers will store well at room temperature for about 2 days.
In the fridge: For longer storage, store this apple crisp in the refrigerator for up to 5 days.
In the freezer: I don’t recommend freezing leftovers because I don’t think the crisp topping will hold up.
Reheating: I recommend reheating it in the oven or a toaster oven for the best results. The microwave will work for reheating, but it will make the crumble topping soggy and not as crisp!
Frequently Asked Questions
Depending on where you live, apple crisp and apple crumble may mean the same thing! In the United States, they are slightly different dishes. Apple crisp is baked apples topped with a mixture of oats, nuts, sugar and spices. Apple crumble is also baked apples but is topped with more of a streusel mixture of flour, sugar and butter. No matter what you call it, they’re both delicious!
No! This is totally a personal preference. I’ve made these muffins with both peeled and unpeeled apples and both are delicious! If the skin doesn’t bother you then you can totally skip peeling the apples, which will save time! Once the apples are cooked the skin will soften so it’s hardly noticeable.
I haven’t tried it, but it should work just fine to double the recipe and make it in a 9×13 pan. When it comes to the bake time the crisp might need a few more minutes, so I’d just keep an eye on it.
Not all apples are great for baking. When choosing apples for baking you want apples that are firm and keep their structure under heat and don’t turn into mush after baking. The crisp and firm Granny Smith and Honeycrisp varieties are the most popular when it comes to baking. Pink Lady, Golden Delicious, Braeburn, Fuji, Cortland and Jonagold are also great options. Feel free to use just one variety or use an assortment of varieties. I like to use both sweet and tart apples in this crisp!
Avoid softer apples like Red Delicious or McIntosh; they’re more likely to break down and turn mushy in the oven.
Yes, you can absolutely make this apple crisp ahead of time, which is ideal for a busy Thanksgiving prep. You have two options: bake the crisp fully, let it cool, cover, and refrigerate for up to 2 days, then reheat at 350°F for about 20 minutes before serving. Or, prepare the crisp without baking, cover and refrigerate, then bake fresh when you’re ready to serve.
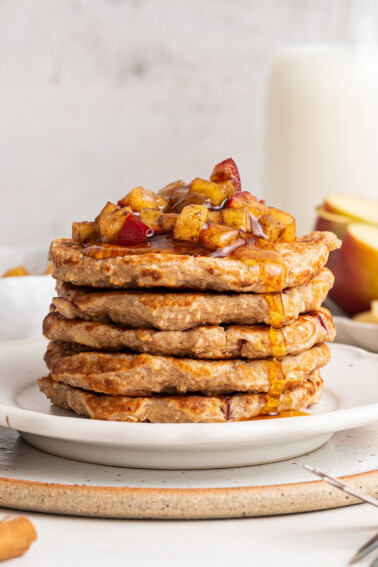
More Apple Recipes to Try
If you enjoyed this recipe, please consider leaving a ⭐ star rating and let me know how it went in the 📝 comments below.
Healthy Apple Crisp
Ingredients
- 6 cups apples, about 6 medium apples, peeled (or unpeeled) and thinly sliced
- ¼ cup pure maple syrup
- 1 Tablespoon lemon juice
- 1 Tablespoon arrowroot powder, or cornstarch
- 1 teaspoon ground cinnamon
- ⅛ teaspoon ground nutmeg
- ⅛ teaspoon sea salt
Topping
- 1 cup coconut sugar
- 1 cup old-fashioned rolled oats, gluten-free, if needed
- ½ cup almond flour
- ½ cup chopped pecans or walnuts
- ½ cup coconut oil, not melted
Instructions
- Preheat oven to 350°F.
- Make the topping by mixing together sugar, rolled oats, almond flour and nuts. Add butter or coconut oil and combine until topping is crumb-like. Set aside.
- Add apple slices to a large bowl with maple syrup, lemon juice, arrowroot powder, cinnamon, nutmeg and salt. Gently toss until all apple slices are coated.
- Transfer apple mixture to greased 8×8 square baking dish or a 9-inch round pie pan.
- Sprinkle crisp topping over apple mixture.
- Bake for 45-50 minutes or until the apple filling is bubbly and the top is golden. Check the crisp around 30 minutes in. If the crisp seems to be browning too quickly, cover with foil for the remaining 15-20 minutes.
- Cool on a wire rack for 5-10 minutes.
- Serve warm with ice cream or whipped topping.
- Store in an airtight container. Leftovers will store well at room temperature for 2-3 days or in the refrigerator for up to 5 days.
Video
Notes
- Storage: Store leftover apple crisp at room temperature for up to 2 days or in the fridge for up to 5 days. Freezing isn’t recommended, as the topping may lose its texture. For reheating, use the oven or toaster oven to keep the topping crisp, as the microwave can make it soggy.
- Make it nut-free: If you need this recipe to be nut-free just swap the nuts for additional oats and the almond flour for all-purpose flour or oat flour.
- Want to make it lower in sugar? If you’d like for the crisp to be less sweet, feel free to cut the sugar in the topping back to 1/2 -3/4 cup instead of 1 cup.
Nutrition
Nutrition information is automatically calculated, so should only be used as an approximation.
Like This Recipe? Rate & Comment Below!


Perfect crisp! I didn’t have cornstarch so I used 2 T AP flour although I used almond flour in the crisp topping. I baked in 11×7.5 dish.
Thank you so much for sharing, Jann. I am glad this recipe turned out great for you and you are enjoying it. Thank you so much for your review, I really appreciate it!
This recipe was AMAZING!!!! SO SO SO GOOD!!! And very easy to make. I’m currently making it again for the 2nd time. I could eat the whole thing myself! 🤤🤤🤤
This crisp was absolutely delicious! I used oat flour instead of almond, and it tasted spot on! I also used sliced almonds, which added to the “crisp” factor. I served it with vanilla ice cream, and everyone was scraping their bowls and heading back for 2nds. Thanks again for yet another yummy recipe:)
WOO! This makes me so happy to hear, Laurel. I am so glad you enjoyed this recipe and it turned out great for you. Thank you for sharing your review & star rating, it means the world to me.
Do you think I could double this recipe and put it in a 9×13 pan? If so, how long do you think I should bake for? Also, do you think I would be able to prepare this the night before, cover it, then bake it the following day? Or would the apples not be that great cut up for that long? Thanks again!
Hi Melissa – Yes, I have 2 options for making this recipe ahead of time you can bake and then reheat before serving or prep, put into fridge and bake when you’re ready. All of this is mentioned in the blog post above. For doubling this recipe, it should work just fine, I would just keep an eye on it, it might need a bit more time, but I haven’t doubled this recipe so I am not sure exactly how much more. I hope you enjoy this recipe!
Made this for Thanksgiving this year and it was delicious!! And it was easy to make.
Excellent. I am excited to hear that you this recipe was a hit, Sally. Thank you for sharing your review + star rating, I appreciate it!
I made this for Thanksgiving and even the guests who don’t have allergies were raving about it! This dessert will be making an appearance at all future gatherings in our home. Thank you, EBF!
Yay! I am so glad you and your guests loved this recipe, Piper. Thank you so much for sharing your review + star rating, it means so much to me.
My family loves this recipe and everyone always goes back for seconds! It’s criminally delicious and hubby always loves coming home to the apple cinnamon smell emanating from the kitchen 🙂
Ah yay! I am excited to hear that you and your family are loving this recipe, Diana. Thank you so much for sharing your review & star rating, it truly means a lot to me!
So delicious and warming!
I completely agree! Thank you for sharing your review & star rating, I really appreciate it.
Delicious! I served this without any topping; very yummy on it’s own. So easy to make; not too sweet. Perfect Fall dessert!
YUM! I am so glad that you loved this recipe, Bridget. Thank you so much for sharing your review + star rating, I really appreciate it.
This is such a good recipe! It was eaten instantly 😊 I didn’t have almond flour with me, but used coconut flour and it tasted perfect!
WOO! This is the best, Chloe. I am so glad you’re enjoying this recipe and it turned out fabulous for you. Thank you for sharing your review + star rating, it means so much to me!
I was looking forward to having some left for me to eat the next day… none was left it was finished quickly. Everyone who tried it loved it. I am glad I have a few more apples left to make a new batch I will be taking to a family gathering, making sure to save an extra piece for me.
Ah I am excited to hear that this was such a hit, Vicki. Thank you so much for coming back and sharing your review + star rating, I so appreciate it.