
Master Bathroom Renovation – White, Bright Small Bathroom
This post may include affiliate links. Thank you for your support.
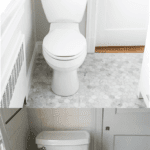
A small white and maroon 1950’s bathroom gets transformed into a clean, bright and beautiful space. I’m sharing before and after photos along with the full source list.
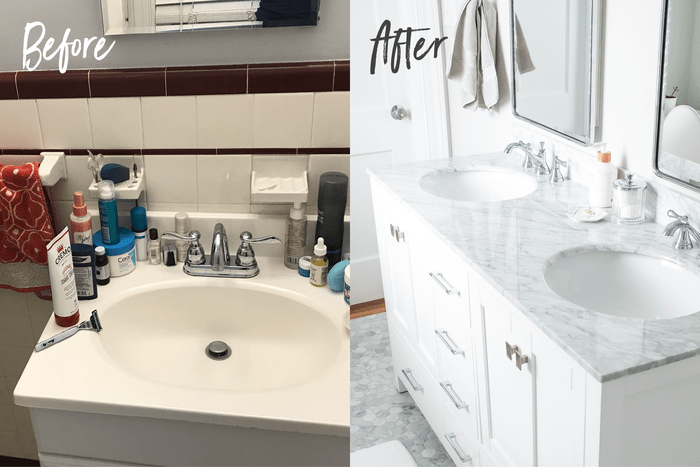
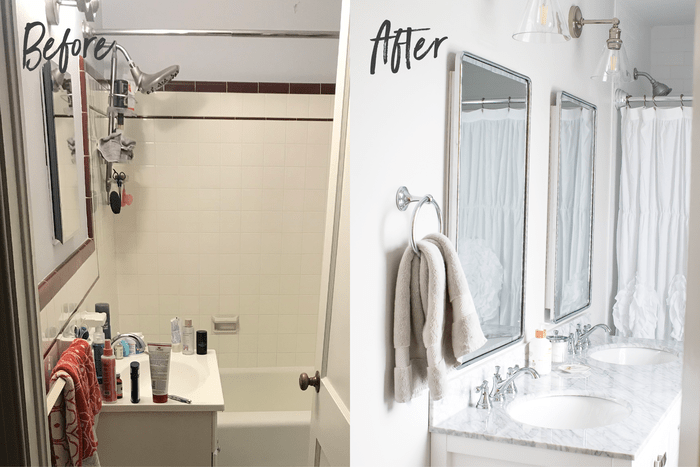
Welcome to our new master bathroom! We went 5 weeks without a shower, but it was worth it because we no longer have to fight for space in a cramped bathroom or try to make 50-year-old tile look clean.
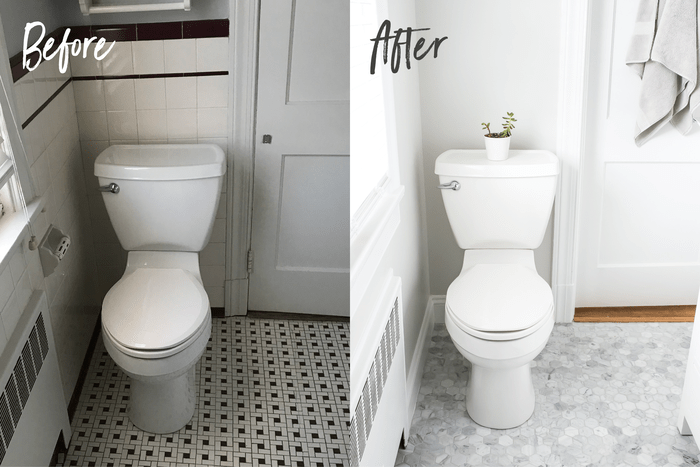
When we moved into our house about three years ago, there were no photos of the bathroom on the MLS listing – and there was definitely a reason for this! As you’ll see from the before photos, the bathroom was tiny, with zero storage space, broken floor tiles, a big black spot on the bathtub from a slow water leak and peeling paint on the walls. Needless to say, I’ve been wanting to update this bathroom since the day we moved in and I am so over the moon that we were finally able to make it happen.
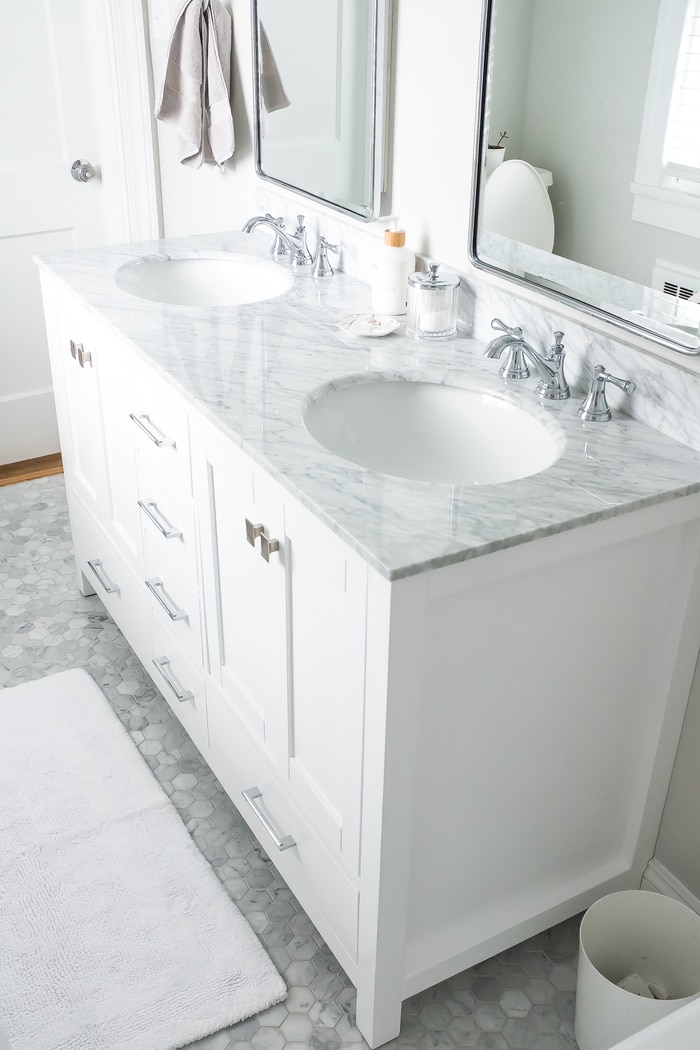
So here’s the grand reveal… from dark and cramped to bright and airy, this space has been totally transformed and we are so happy with the final result.
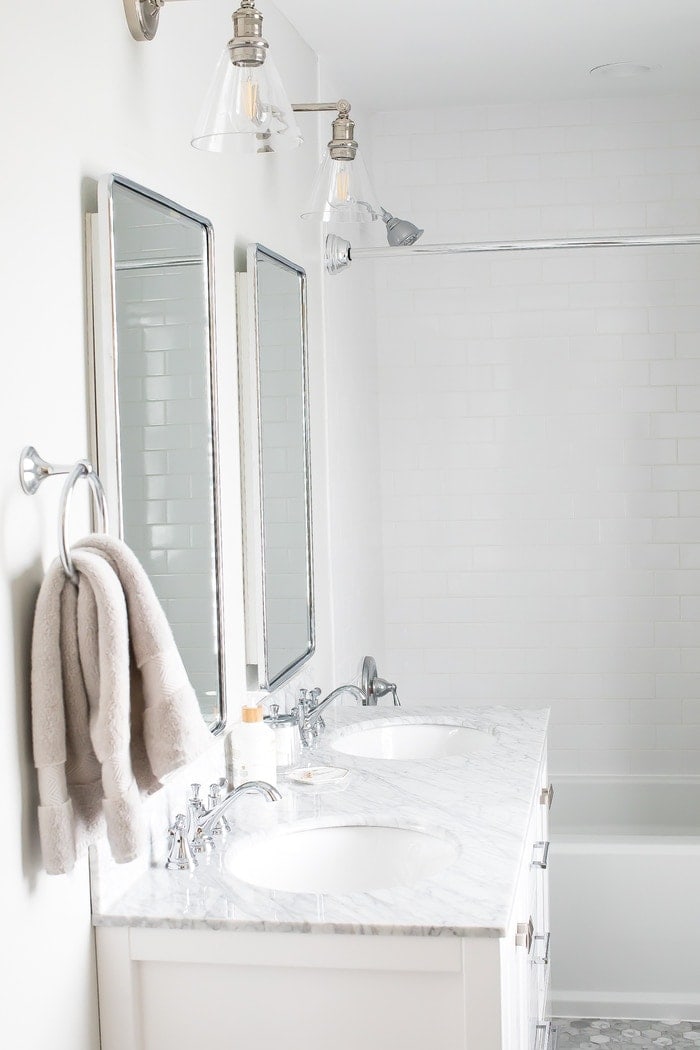
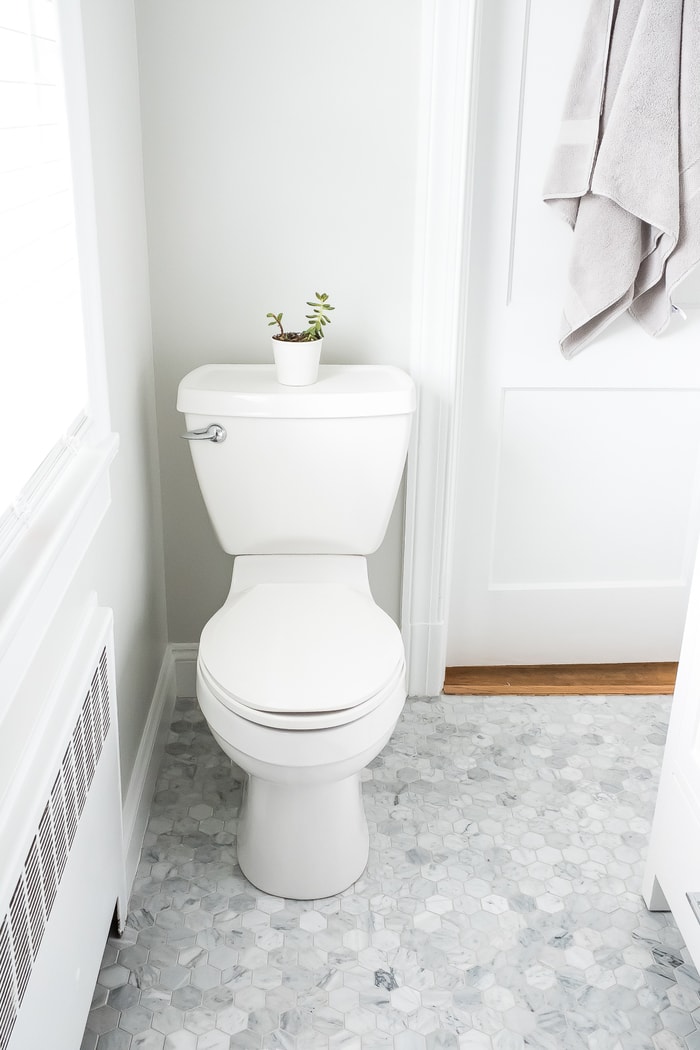
The whole color scheme and design for the bathroom started with the marble hexagon floor tiles.
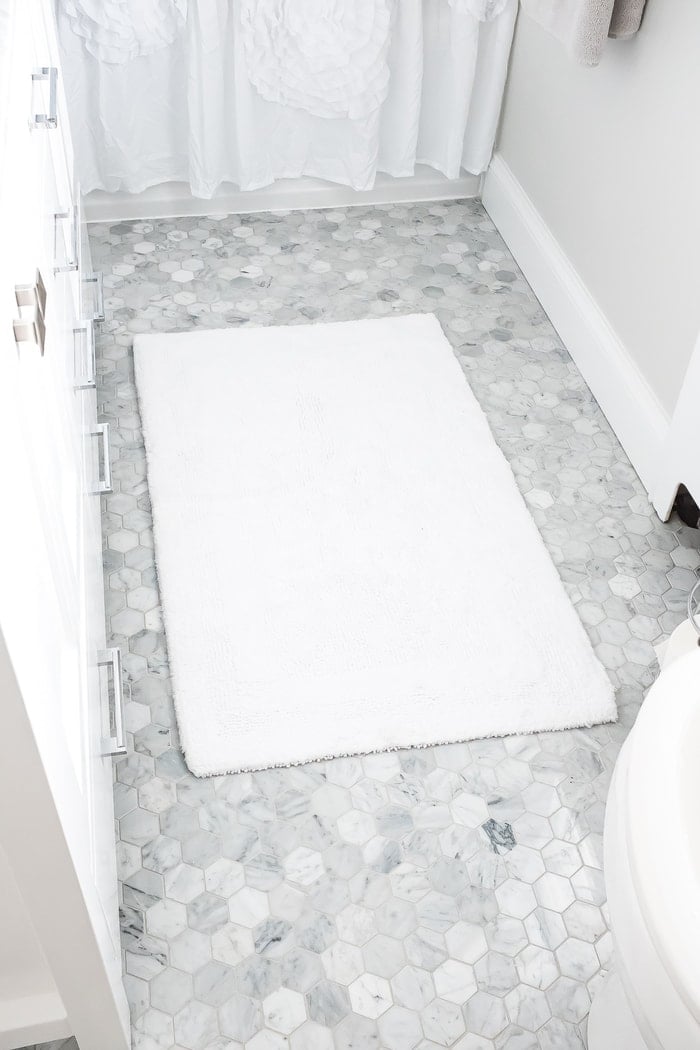
I am legit obsessed with this tile… I saw it for the first time during a home tour back when we were house shopping and I couldn’t get them out of my head. I knew when we decided to renovate our bathroom that we had to start with the marble hexagons and build out the room based on that.
I will say that once the renovation process started, I quickly realized that interior design is not my strong suit and Isaac isn’t super interested in the small details. Isaac is also colorblind so he really can’t offer much assistance when it comes to choosing colors.
I know what I like when I see photos on Pinterest, but choosing exactly what items to purchase was incredibly hard. There are SO many options out there. I mean, Benjamin Moore has 50+ different shades of white paint for goodness sake. I ended up using two photos I found on Pinterest as my prime inspiration and asking a few friends for advice, but there came a time where I just had to purchase everything and hope for the best!
Luckily everything came together and all my choices seem to work!
In terms of making a small bathroom bigger, we did a couple of things:
1. Knock down a wall. Knocking down a wall to expand the bathroom meant losing a closest in our guest room along with more work, time and money invested into the project, but ultimately it was definitely the right decision! We were able to expand the bathroom by about three feet. Three feet isn’t a ton of extra space but when your bathroom is tiny, every little bit helps. Our new bathroom is still quite small for a master bathroom, but honestly, it feels huge to us compared to the tiny space we had previously. With the expansion, we were able to fit a double vanity (something we’ve never had before) and I must say, I honestly didn’t think we needed a double vanity but it’s pretty much the best thing ever. The extra storage space, plus being able to brush our teeth at the same time, has been a game-changer.
Added bonus: To make up for the lost closet space, we turned an old annex room (basically a walk-in attic space) that was attached to the guest room into a finished walk-in closet and it’s so lovely. This is where Isaac keeps his clothes and also where we store our suitcases, vacuum and other odds and ends.
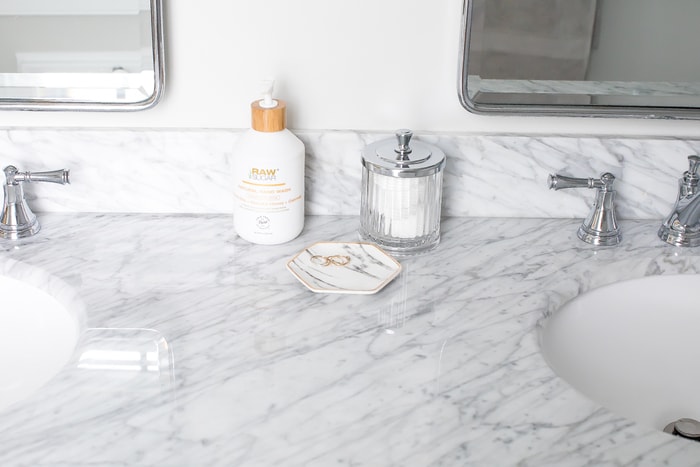
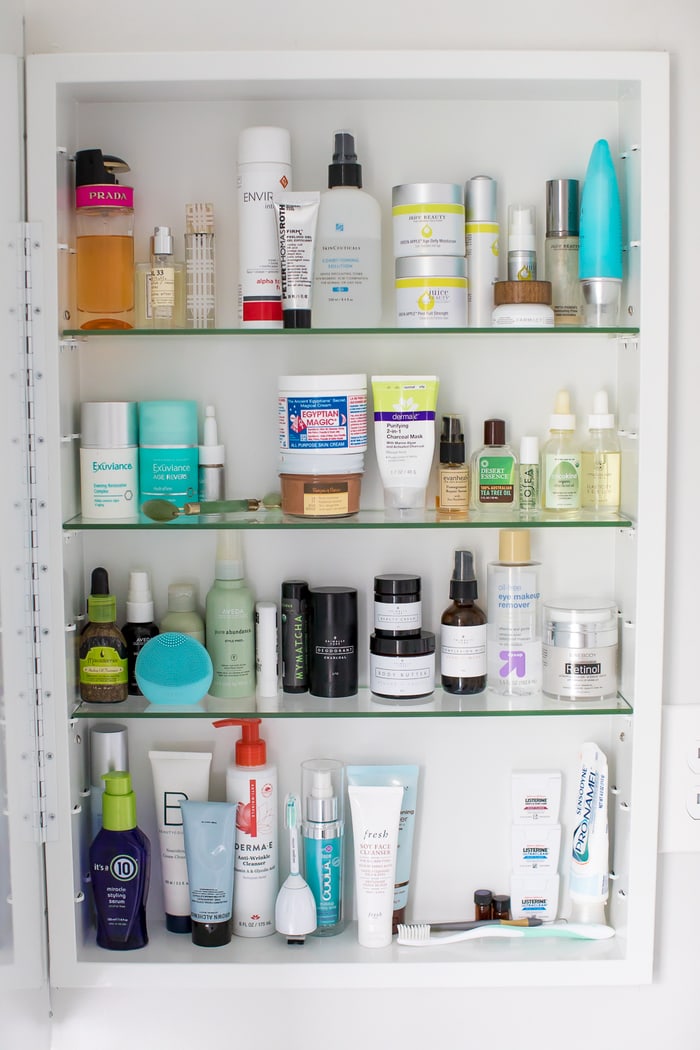
2. Purchase large medicine cabinets. I debated for weeks about whether to purchase regular mirrors or medicine cabinets, and I’m so glad that we went with these vintage medicine cabinets because they are huge and the perfect place to store all our bathroom supplies. Storing supplies under the sink or on the counter works okay, but I find the medicine cabinet works even better. I can see all of my items with one glance and easily grab what I need. Plus, we don’t have to have things all over the countertop like we did before. The bathroom feels so open, airy and clean without all the clutter.
3. Change the direction the door swings: Before the renovation, the bathroom door opened inward towards the bathroom, making it a really tight squeeze to get in and out of the space. We originally planned to keep the door opening in the same direction, but once the new vanity was in we quickly realized there was no way the door was going to be able to swing inwards. Thankfully, we were able to change this last-minute and have the door swing outward. This might not be ideal in some cases, but we have a large foyer at the top of our stairs and having the door open outward doesn’t cause any issues for us and it makes the bathroom much easier to get in and out of.
Just so you can get an idea of what our bathroom looked like before, here are some before and after shots:
Last but not least, I am sharing where I got everything for the bathroom below because while I was in the process of choosing all of my items, other people’s blog posts that provided source lists were so incredibly helpful (yet pretty rare). It was so frustrating to find something I loved but not be able to click through to the source, so here you go . . .
See my bathroom renovation Pinterest board + inspiration photo #1 – from Studio Mcgee, inspiration photo #2 – from Young House Love
Source List
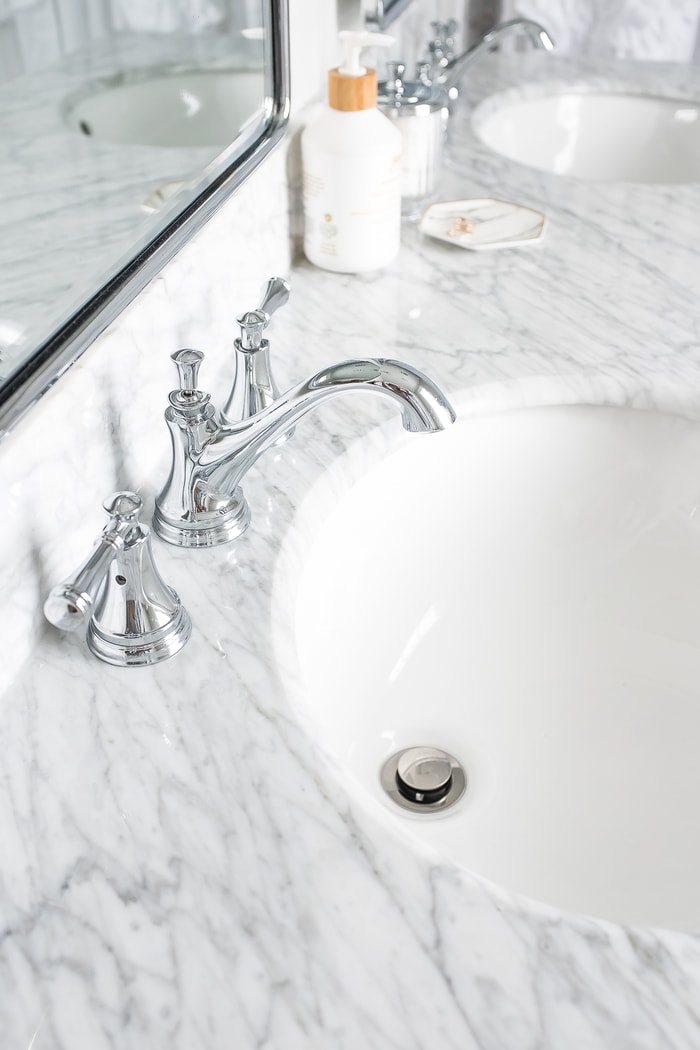
paint: Benjamin Moore Gray Owl, lightened up 50%/ bathtub tile: white subway tile / bathroom floor tile: carrara marble hexagon mosaic / shower head and faucet / straight arm sconce / large vintage recessed medicine cabinets / vanity / vanity faucets / shower curtain / cotton ball holder / super soft white bathroom rug / softest bath towels ever
[show_shopthepost_widget id=”3273512″]


Hi Maria,
I have a quick question my wife and I have exact same before tiles in our bathroom. My question is did you remove the tiles before placing the new ones or did you just place the new tiles on top of the old ones?
Hi, Albert. Yes, we removed the old tiles before replacing them! Hope this helps.
I really enjoyed your blog, and I appreciate you sharing this information regarding a little bright bathroom!! I’m overjoyed to have discovered this really well-written post. Thank you for sharing, and I hope to see more in the future!! Continue to do this inspiring work and share it with us.
The marbling effect from the floors to the countertop is your fluid design that gives your white bathroom ensemble a different vibe without overpowering the overall design.
I loved your blog and thanks for publishing this about small bright bathroom!! I am really happy to come across this exceptionally well written content. Thanks for sharing and look for more in future!! Keep doing this inspirational work and share with us.
So glad you enjoyed this post!!
A small white and maroon bathroom from the 1950s is converted into a tidy, light, and lovely space. They’re releasing before and after pictures as well as a complete source list. Thank you!
Wow! A small white and maroon 1950’s bathroom gets transformed into a clean, bright and beautiful space. Thank you for sharing before and after photos along with the full source list.
Best of information regarding the brightness in the small bathroom. In order to get better information and guidance can be taken from this blog specifically. It plays a vital role in taking us through. It can be really great for people like me who are looking for grabbing more knowledge about.
Wow! Amazing bathroom renovation! I can’t deny it’s almost perfect. Thanks for the ideas. Keep posted.
Thank you so much for sharing this information about small bright bathroom. This is very nice and inspiring!! Thanks for sharing and look for more in future!! I hope you keep update us with such great tips and information in future too. This is a great post; I will share as much as I can.
That’s what I was searching for thank you soo much for writing on this topic.
I found this is an informative and interesting blog so I think so it is very useful and knowledgeable . I would like to thank you for the efforts you have made in writing this blog.
Thanks for sharing the blog it is a very important and interesting topic in which peoples are receiving great information and very helpful.
Would you mind sharing what color grout you used on the hexagon floor tiles and what color grout you used for the white subway tiles? I love this look, but I am having a hard time with deciding on grout color!
Hi! I don’t know the exact color but I know for the floor tile we used a light gray grout. I’ve heard horror stories about white grout for floor tile. And for the shower we used white grout. Be sure to check/test the white grout color because ours looked a little cream/yellow next to the white subway tiles and I was sooo bummed. Now I don’t mind or notice it but in the moment it wasn’t the look I wanted. Just with paint, there are many variants of white colored grouts!
I really appreciate you for publishing this blog here about small bright bathroom; it’s really a helpful and very useful for us. This is really appreciated that you have presented this data over here, I love all the information shared. Great article!
Your blog is amazing it givers so much ideas and information.
The color feels heavenly. It matches the cleanliness of the place and gives a feel of home.
Hi Brittany,
I loved this post, especially the bathroom transformation that you have done.
Really appreciate the work.
This looks really amazing and thank you for sharing these tips, They are really helpful as I am planning to renovate my bathroom and It has an area like your bathroom so your article is an inspiration for me.
Oh! So lovely. Very very informative. Smart advise. Thanks a lot for your valuable info.
You did amazing! ? all your hard work paid off..and waiting. Beautiful choice!
Love this!!! So beautiful!!We are buying a huge house(we think).Any tips on removing wallpaper? Some of it is dark and makes the study/office look too dark. Some of it just dates the beautiful house.
Yay! Congrats on purchasing your new house. I have no experience removing wallpaper but I bet the blog Young House Love has some tips! 🙂 https://www.younghouselove.com/
Looks fabulous…I know you are a happy woman.
LOVE everything about this! We have a single vanity, and it’s SO tiny! The double vanity makes a huge difference, and I love the marble tile and countertops! 🙂
Looks incredible well done!!
Rebecca | http://www.peppermintdolly.com
What a transformation — looks amazing, girl. Love the clean white!
Girl it looks AMAZING!!! Bathroom goals!
XO, Katie | http://www.meshkomoments.com